The label on it said it was 140cm wide and 180cm long. I thought that I could just about squeeze a knit dress from it. However, as I found out when I started to look at how to cut it, it turned out to be only 120cm wide, which made it much too narrow to cut the front and back side by side, so it was definitely not big enough to make a dress.
So I revised my plans, and went for a cardigan instead.
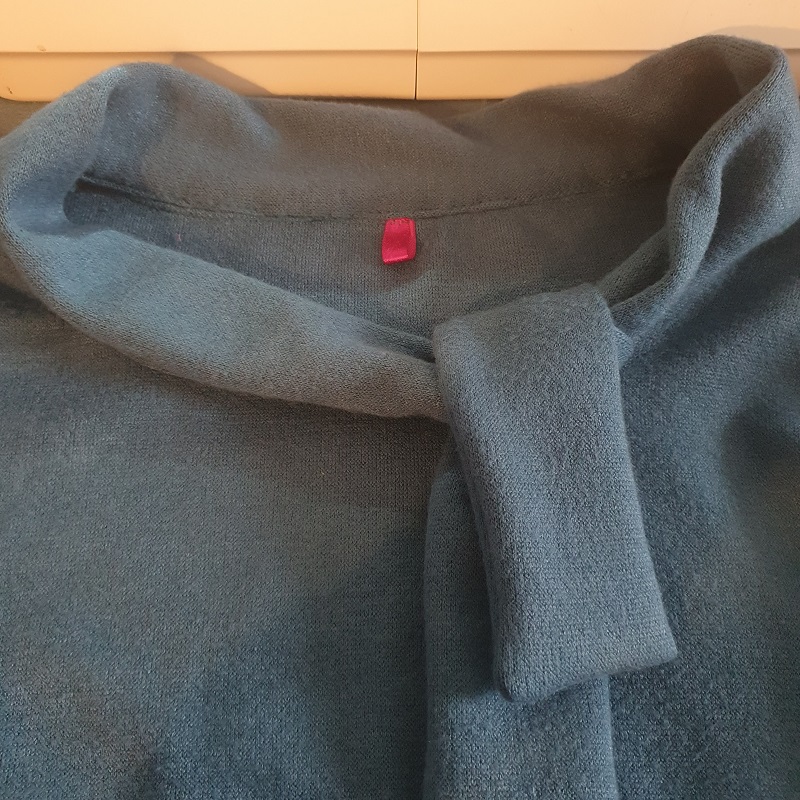
That meant cutting my front as two pieces instead of on the fold, and extending enough on the centre front to create self-facing button/buttonhole bands. I wanted wide bands, so I added 11.5cm, to create a 5cm band on each side and include a seam allowance. I wanted the neckline to be a turtle-neck, or thereabouts, so I raised it on the front pattern piece. I waited until I’d sewn the shell together, to check how it would fit, before finalising the collar cutting. The sewing up was easy enough, and the collar all worked out fine.
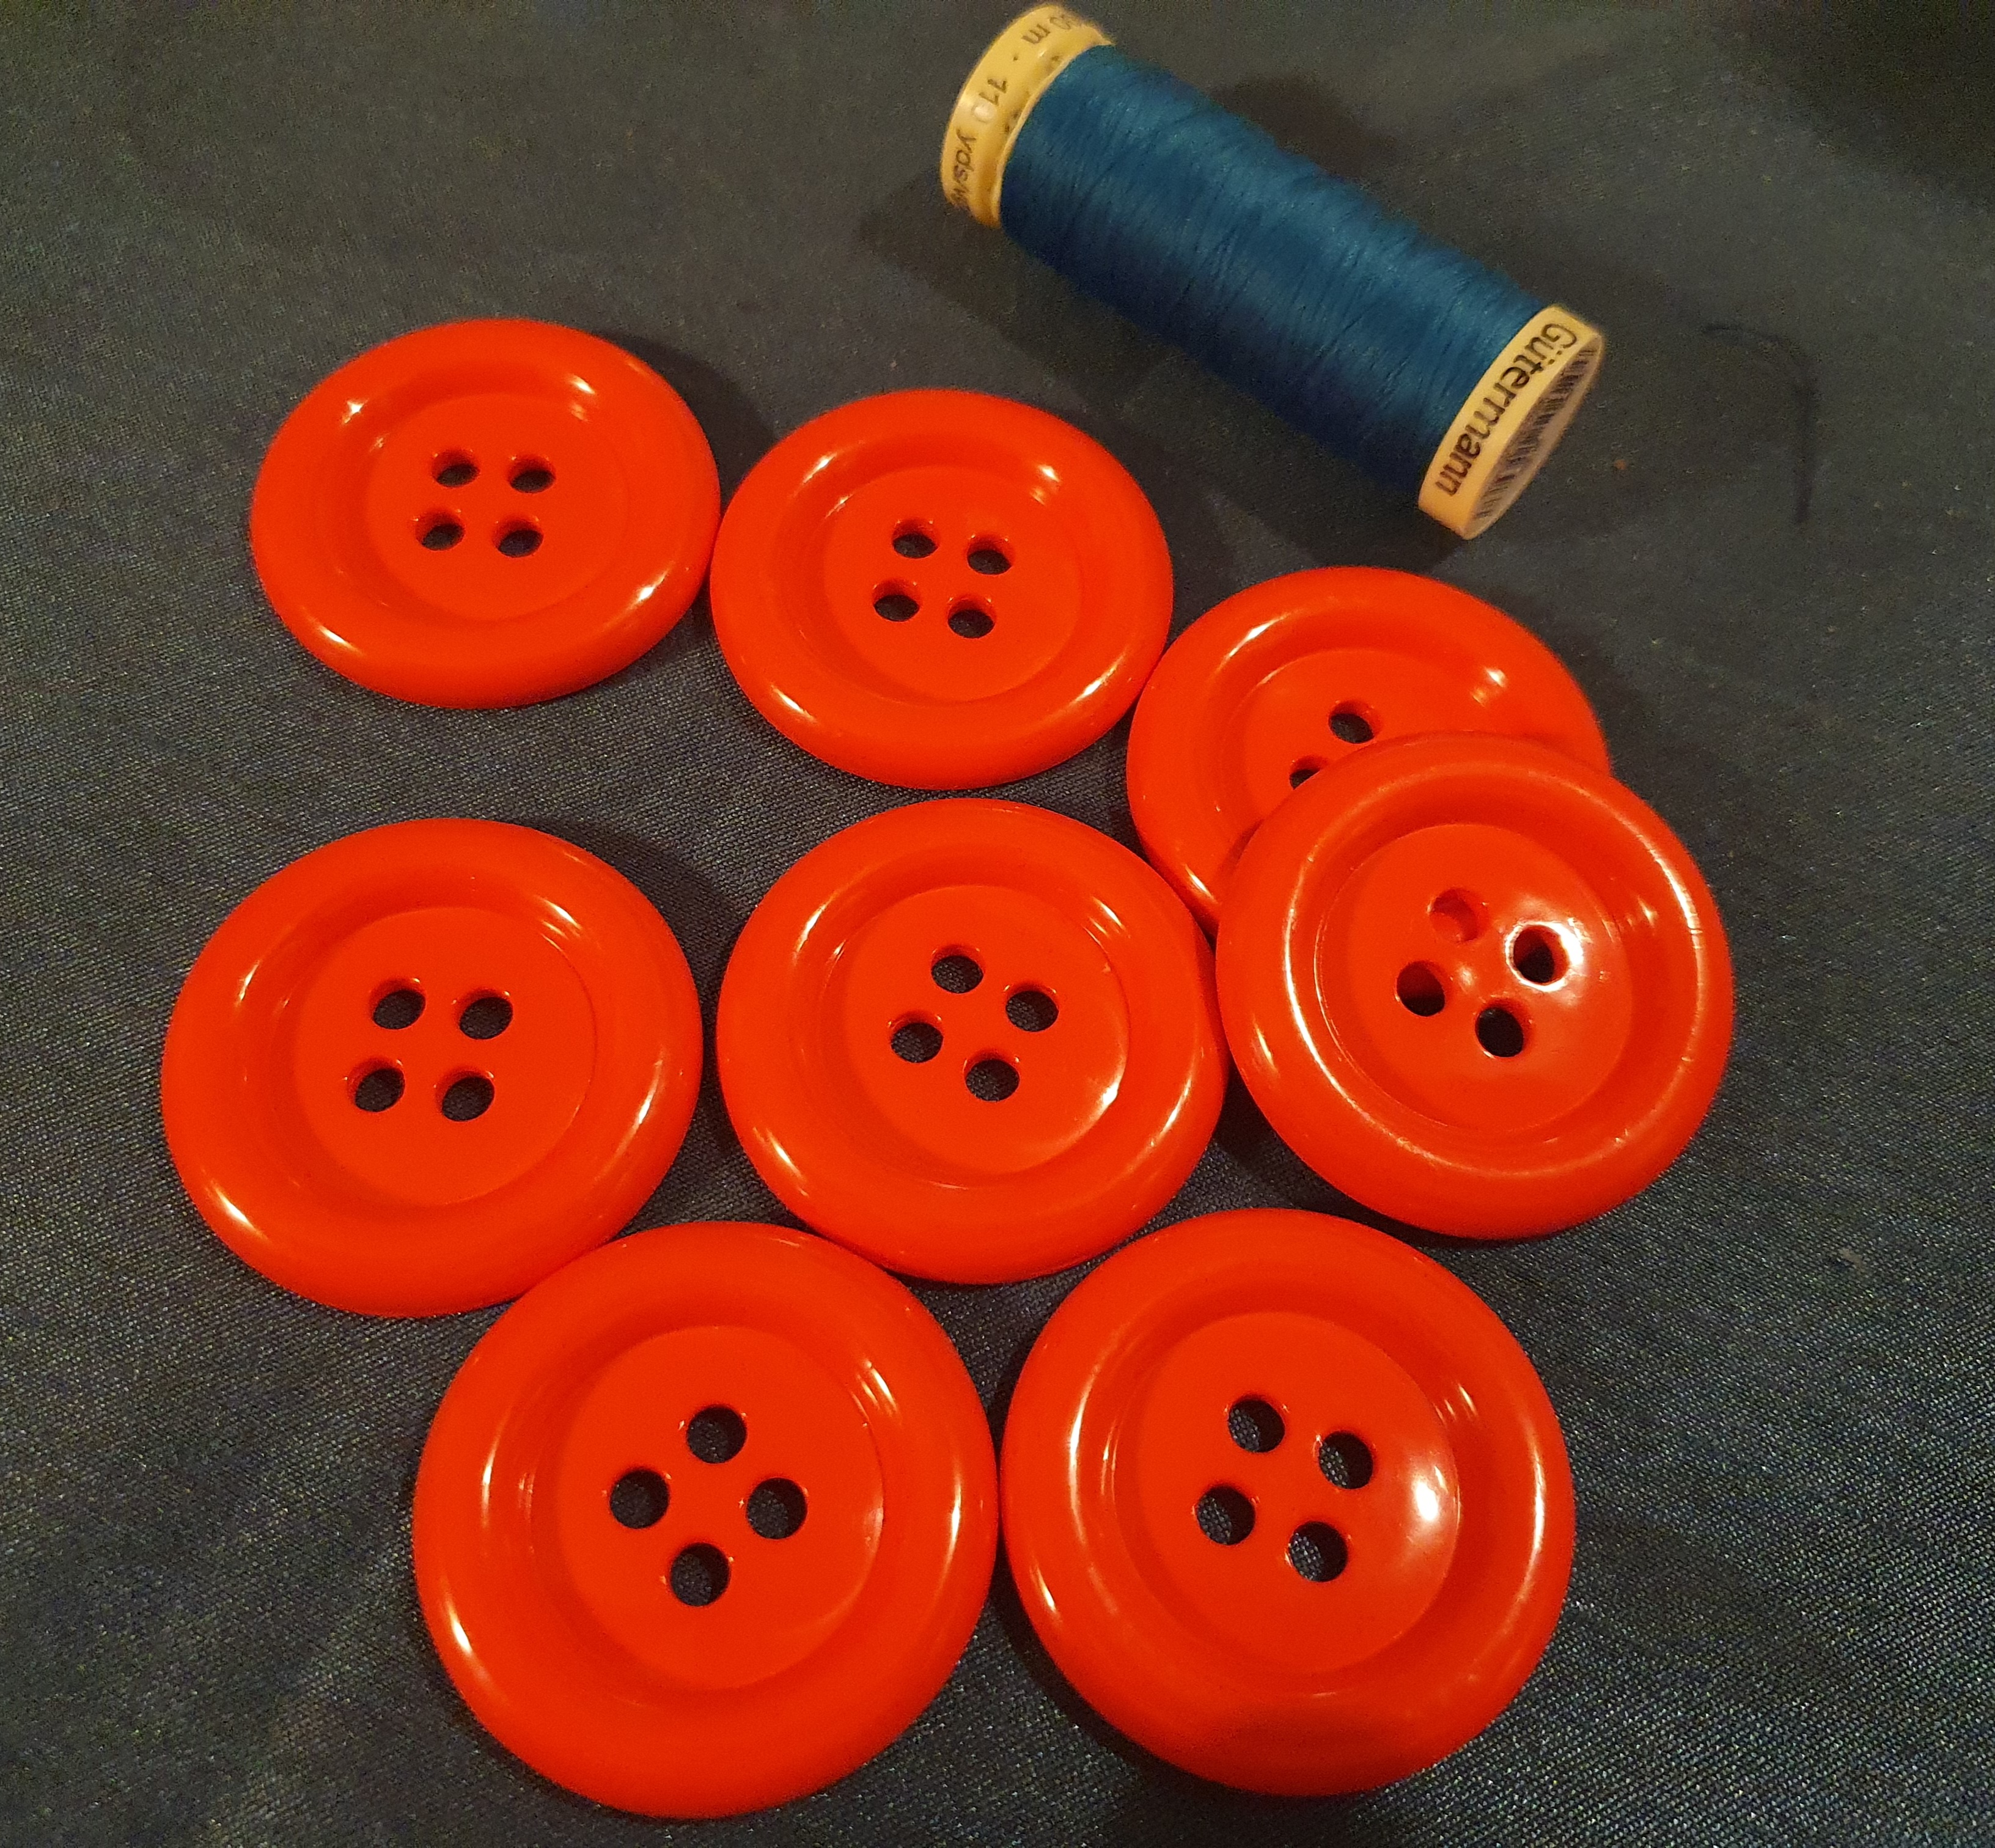
I had decided quite early on in my process that the buttons would be big red ones. Maybe white or navy would have been a more sensible choice, but the idea of red buttons was much more joyous! So I got these “clown” buttons from Ebay.
“Clown Buttons” – they’re not kidding! Bobbin of thread included for size comparison
My next decision was whether to make this a fully functioning cardigan, that opens at the front, or a fake cardigan which will always remain closed, and where the buttons are purely for show. I came down on the side of Fake, because then I’d never have to worry about gape-age. So I sewed the buttons on, then stitched both sides of the button/buttonhole bands together. Yes, in that order, so that the stitches from sewing on the buttons won’t show. So it’s a cardi-sham.
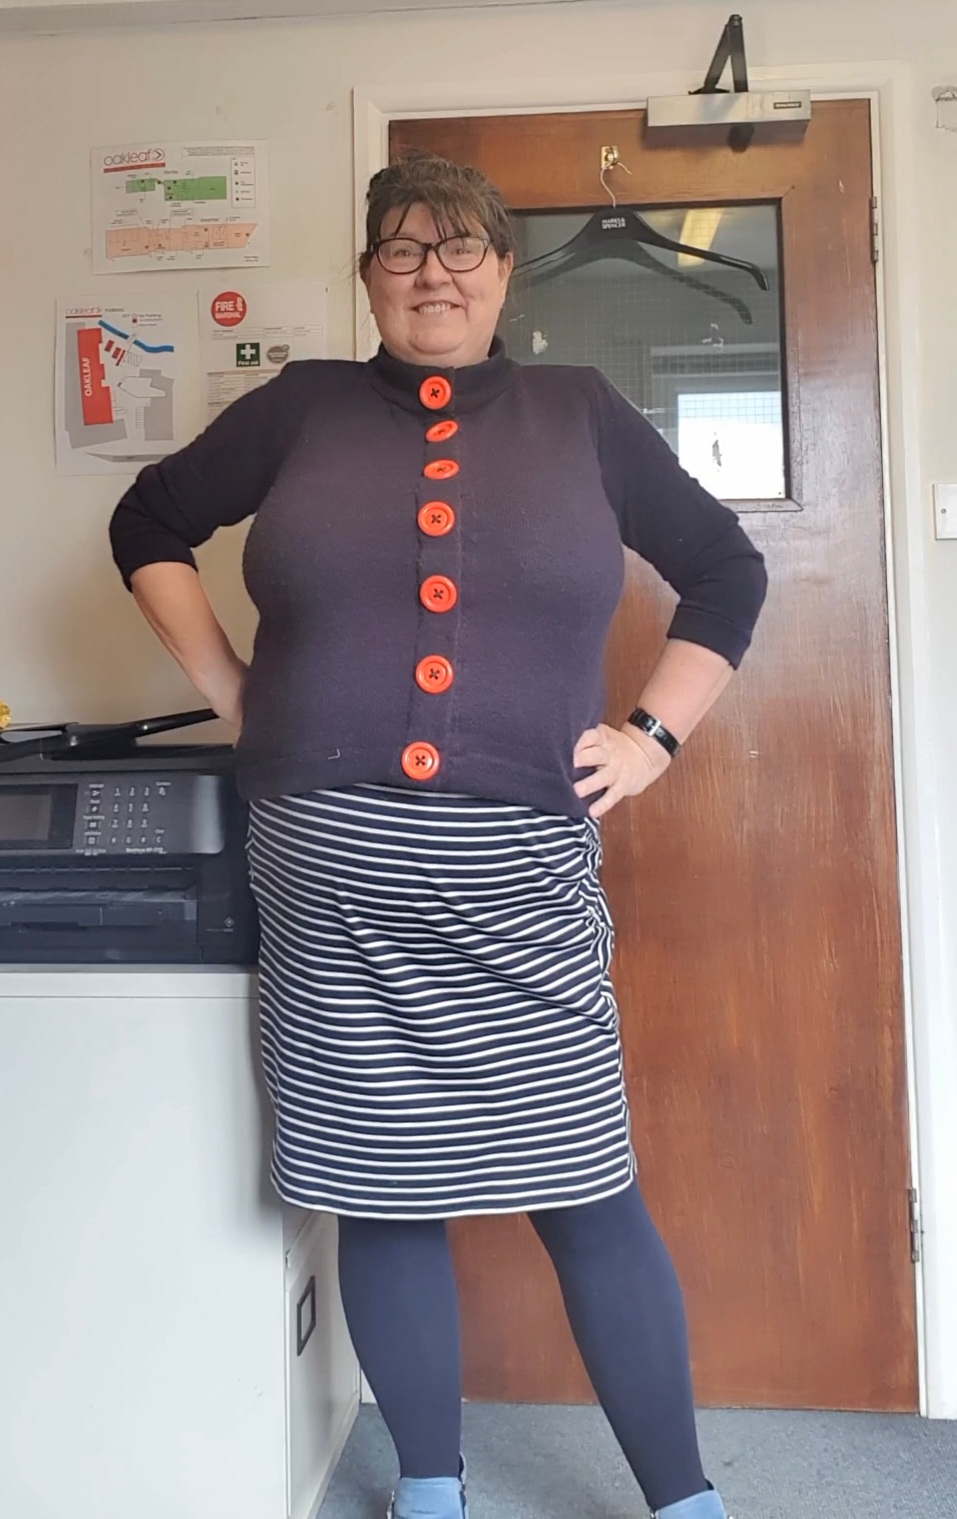
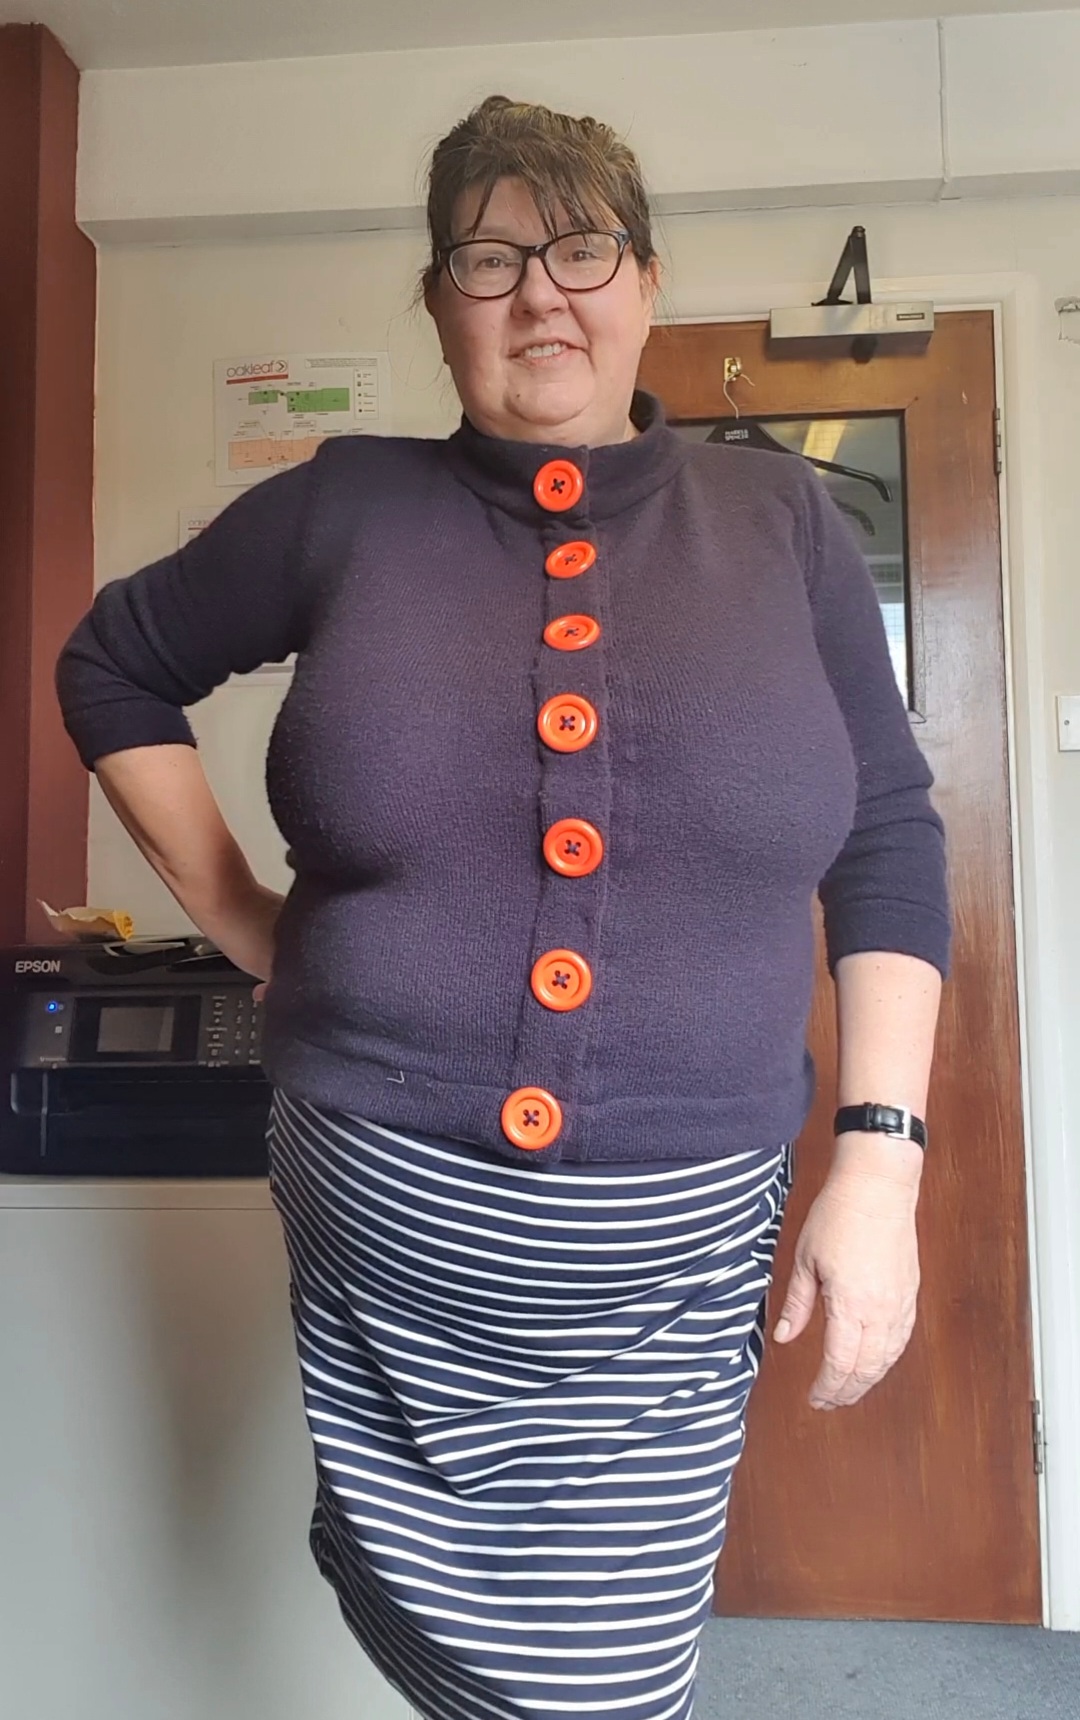
And it all came out as well as I could have imagined. I’m always amazed at how I’m able to take something as intangible as an idea in my head, and turn it into something real and wearable. It really is a kind of magic!
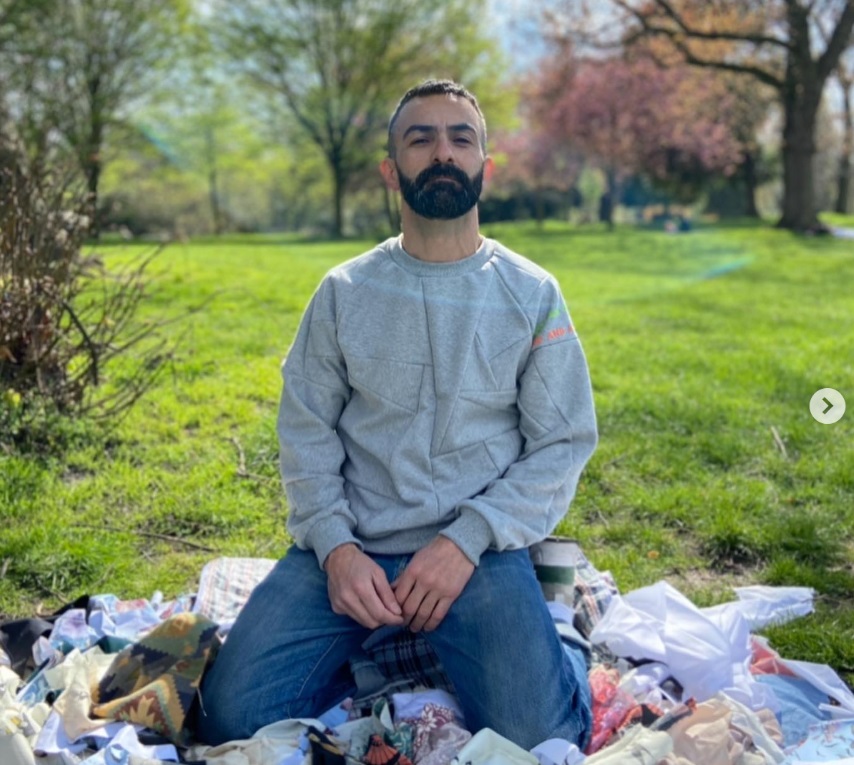
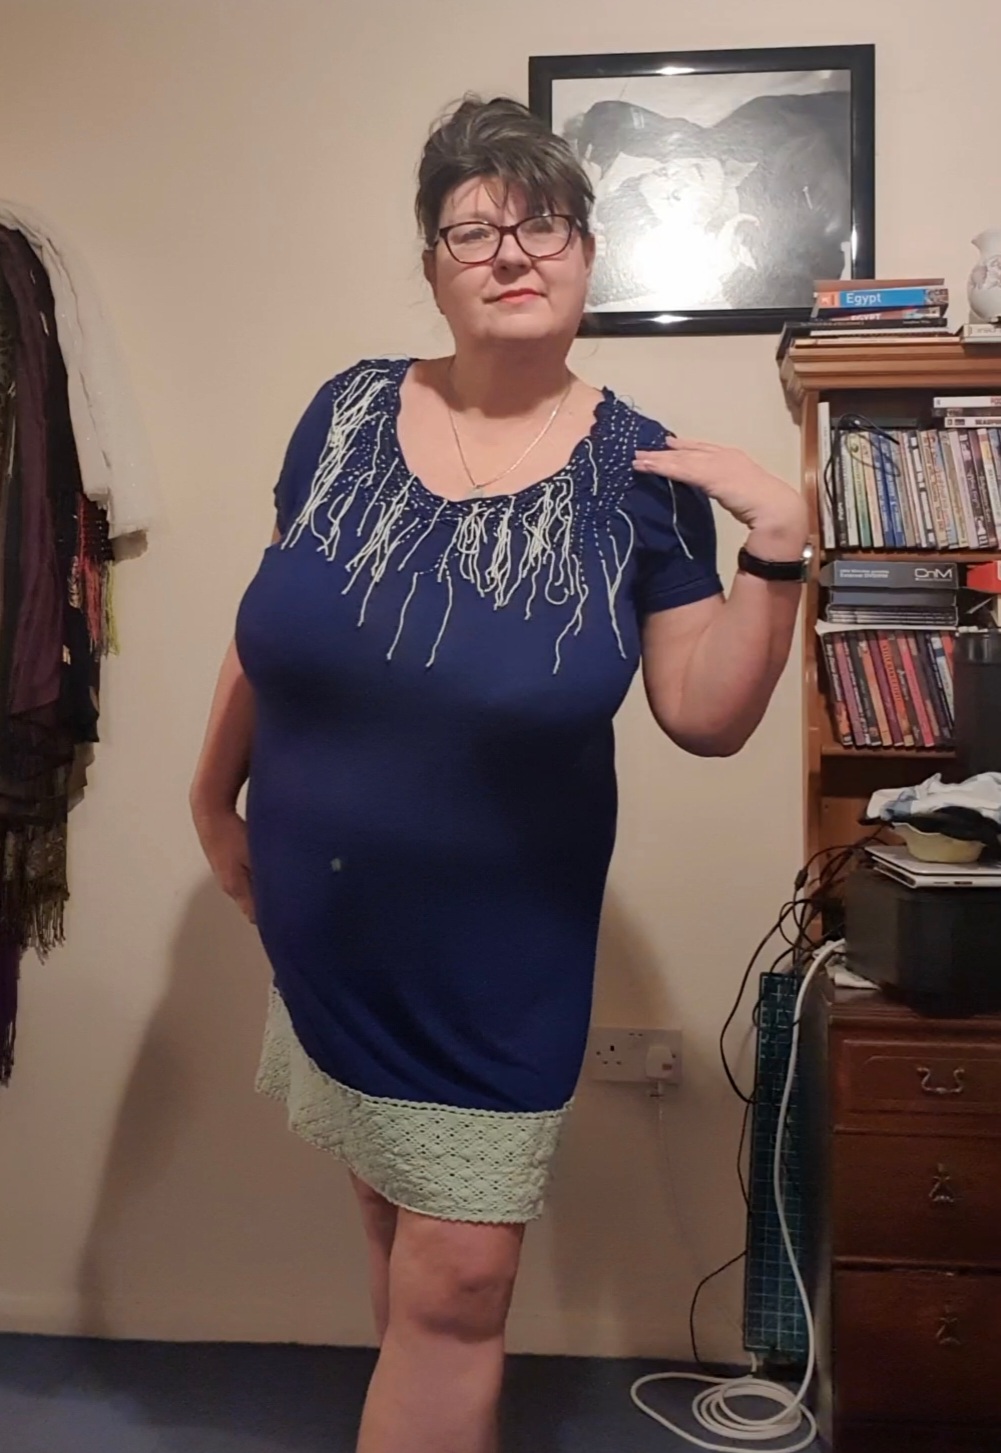
It’s an office selfie, because no-one else is in, I’m wearing it today, and it reminded me I needed to get this posted!
The cardigan goes really well with the Eyewatering Scrappy Skirt
I made the Minty Ponte Top a while ago, at a sewing workshop. Workshops are great, I love them, but they are usually quite tightly timed. That meant I just followed the instructions, and didn’t have the time to really think through the optimal cutting layout to maximise the use of my fabric. So I was left with essentially the side bits that are left over from cutting on a centred fold.
Buoyed by my experience with the eye-watering scrappy stripy skirt, I was determined to patch some of those bits together and make something useful out of them. My first thought was to make a matchy matchy skirt to wear with the top. But, of course!
I started to think about planning and designing. I wanted to be sure of what I was doing so as not to leap in and waste the fabric. With a load of long thin bits, the obvious thing to do was a Panel skirt. But that felt a bit too boring.
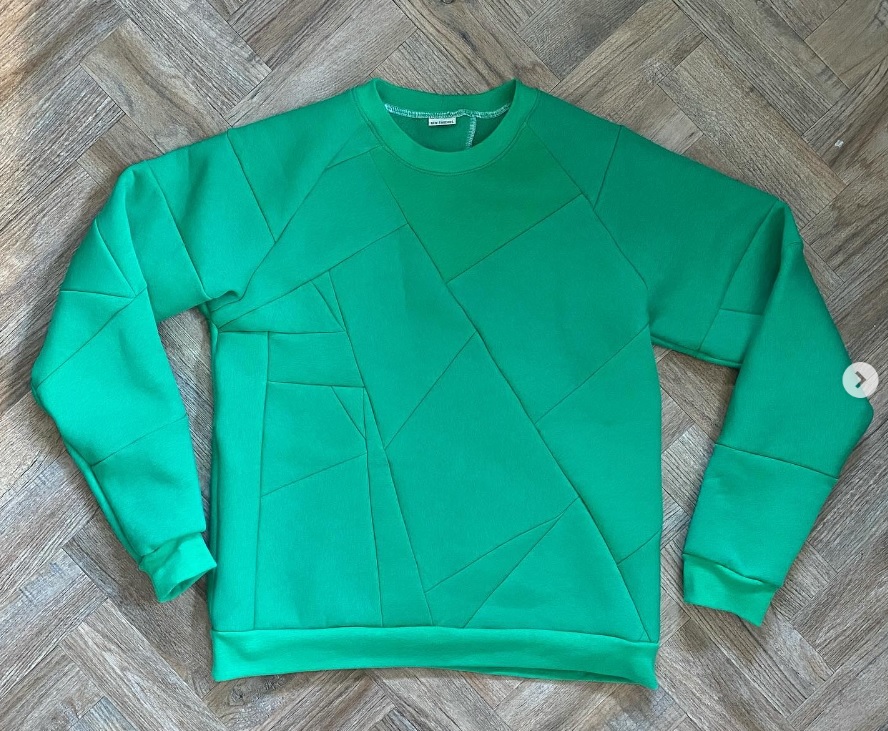
And then I saw Zoe Edwards’ fabulous scrappy sweatshirt:
And I knew that this would be my plan for the skirt.
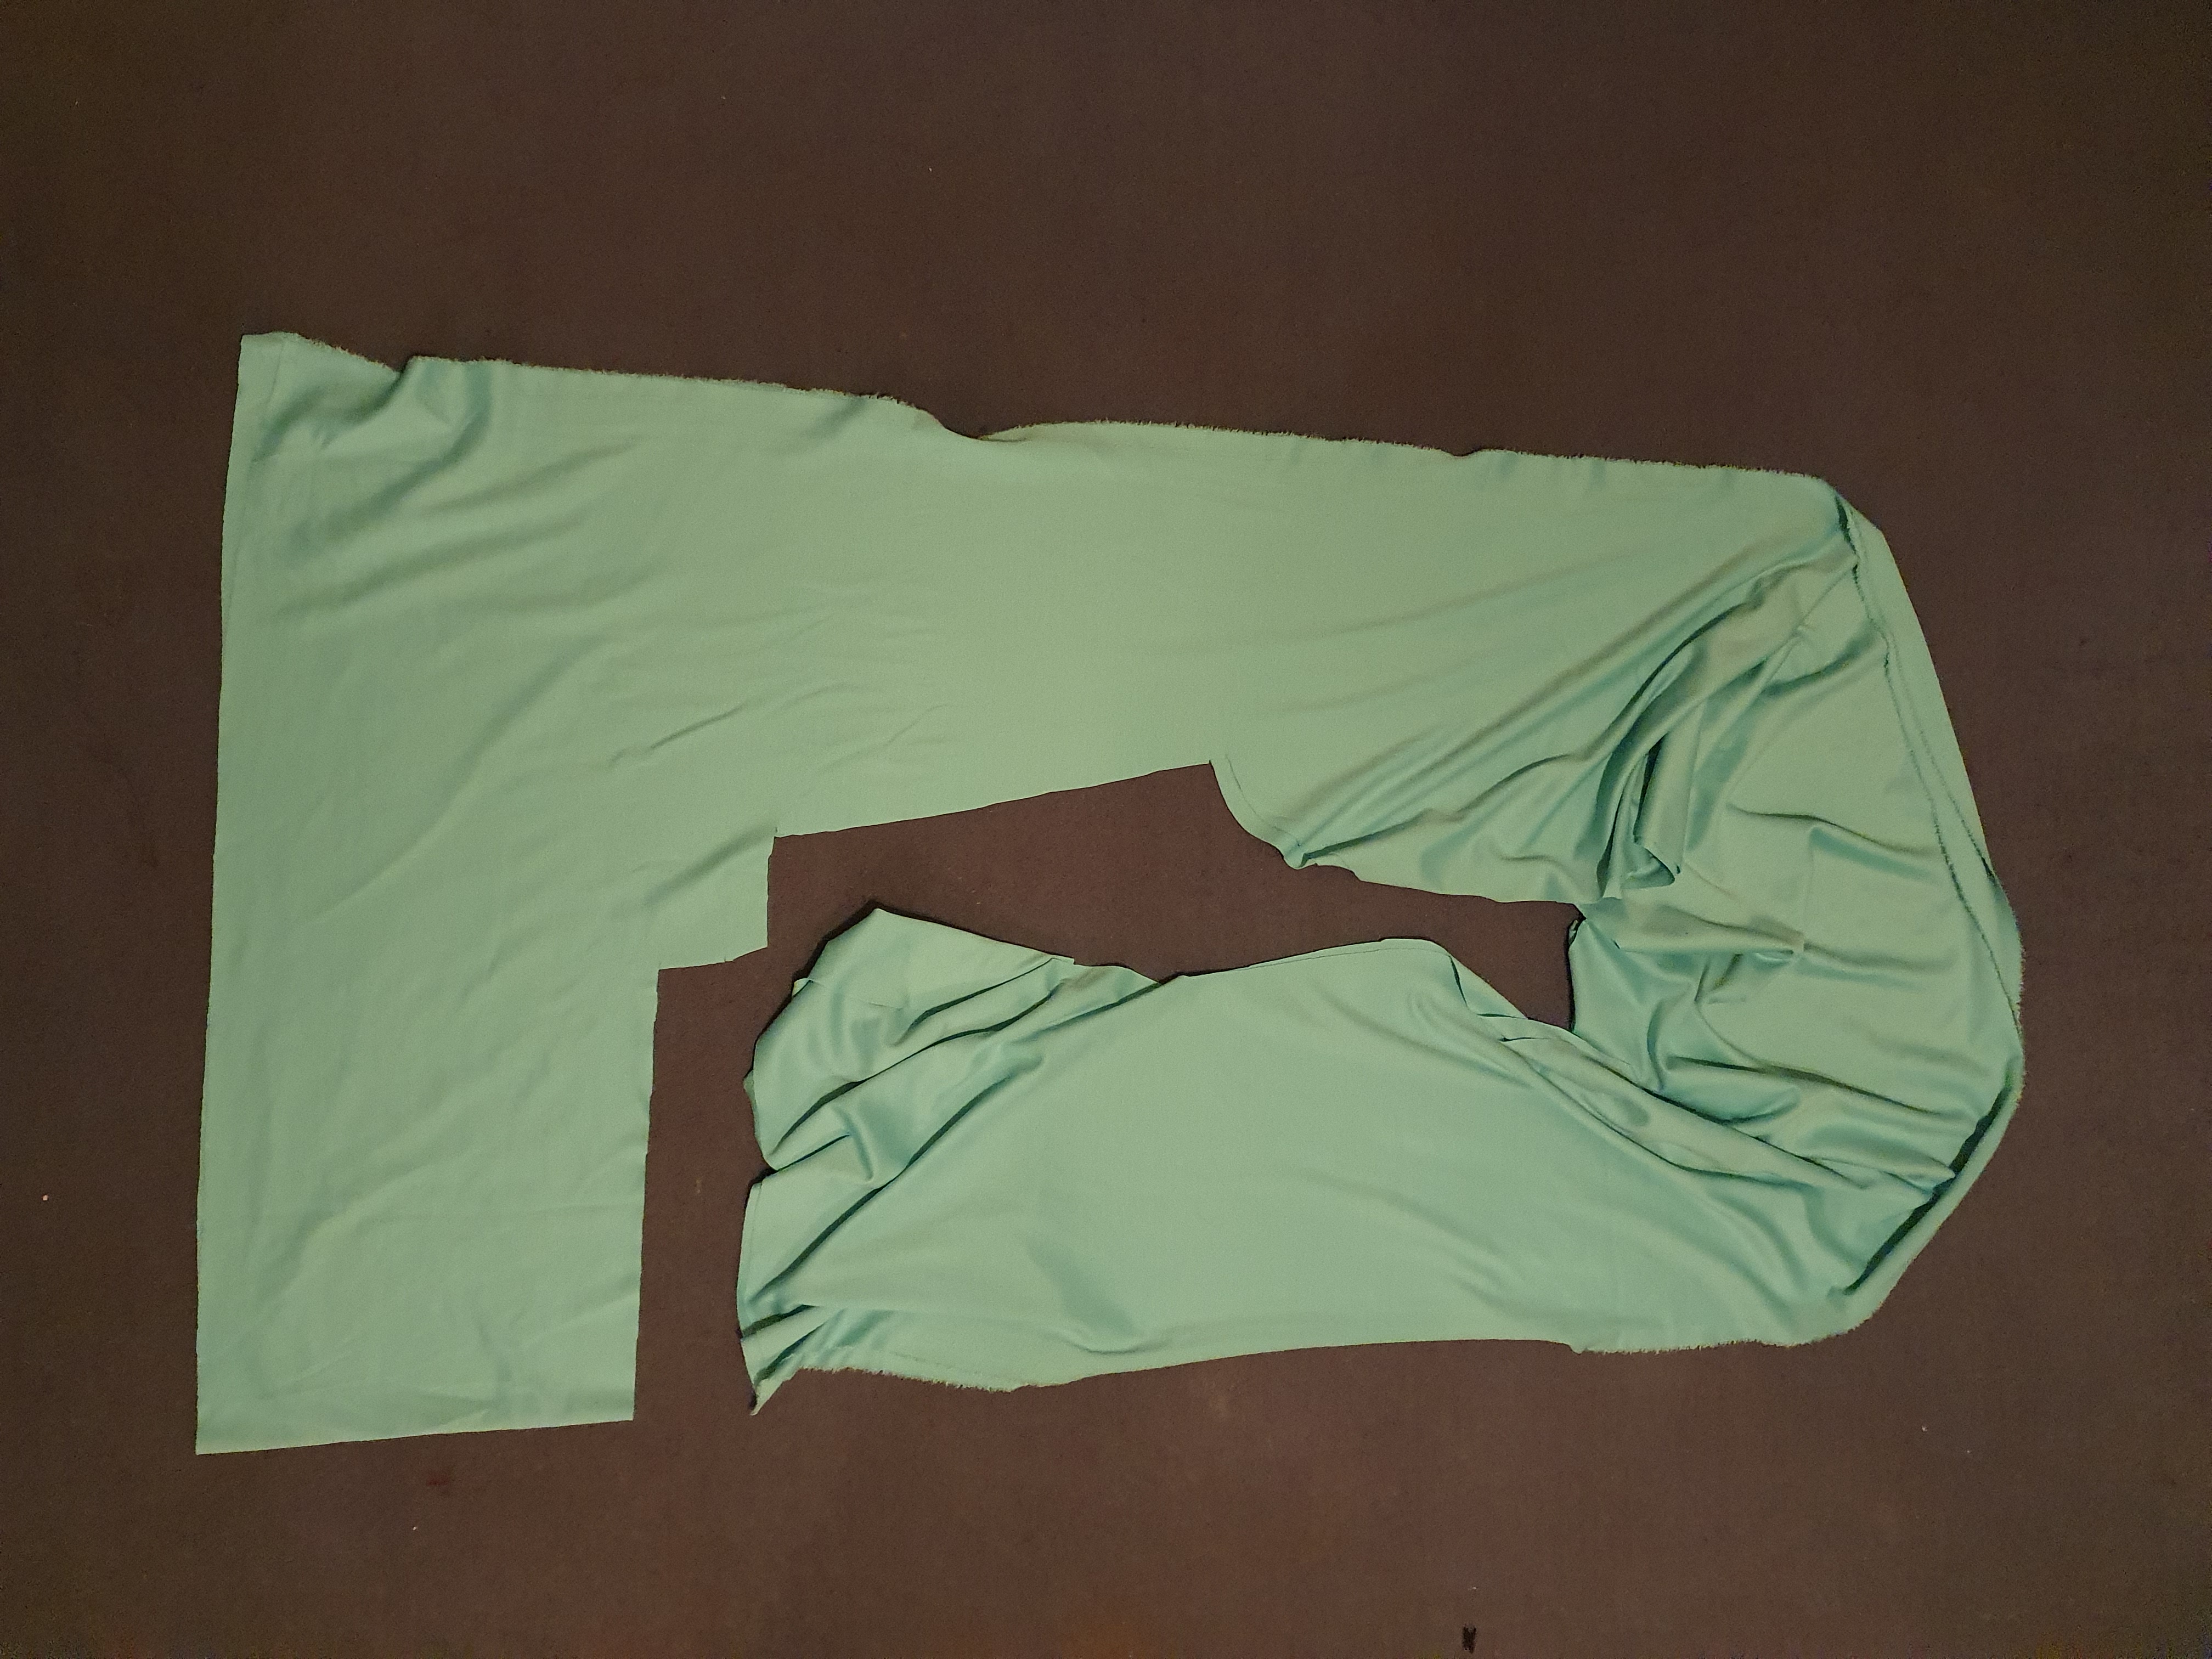
How it started
I basically had a load of long Edge Bits. There were two selvedge pieces between 30cm and 40cm wide and about 2.75m long, and they joined together at the bottom, where I hadn’t cut anything. I decided from the outset, that the full-width section would provide the casing for an elastic waistband, so that it’s all one piece and only one seam to catch on the elastic. The long thin bits were then fully available to patch together. I cut them into rectangles and triangles. I wanted to have some visual variety.
Then it was a case of sewing them all together, to create a length of fabric that I could cut two skirt pieces out of. Zoe had said on her instagram post that she didn’t worry too much about grainlines. That made the process a lot easier. I also didn’t mind too much whether I was using the good side or the wrong side of the ponte. Between those two factors I’ve got some interesting contrasts in how the light reflects off different patches of the fabric.
My main challenge was keeping the fabric that I was creating flat. I wasn’t entirely successful with that, because this is a stretch fabric. But the fact that it’s stretchy also masks that a bit.
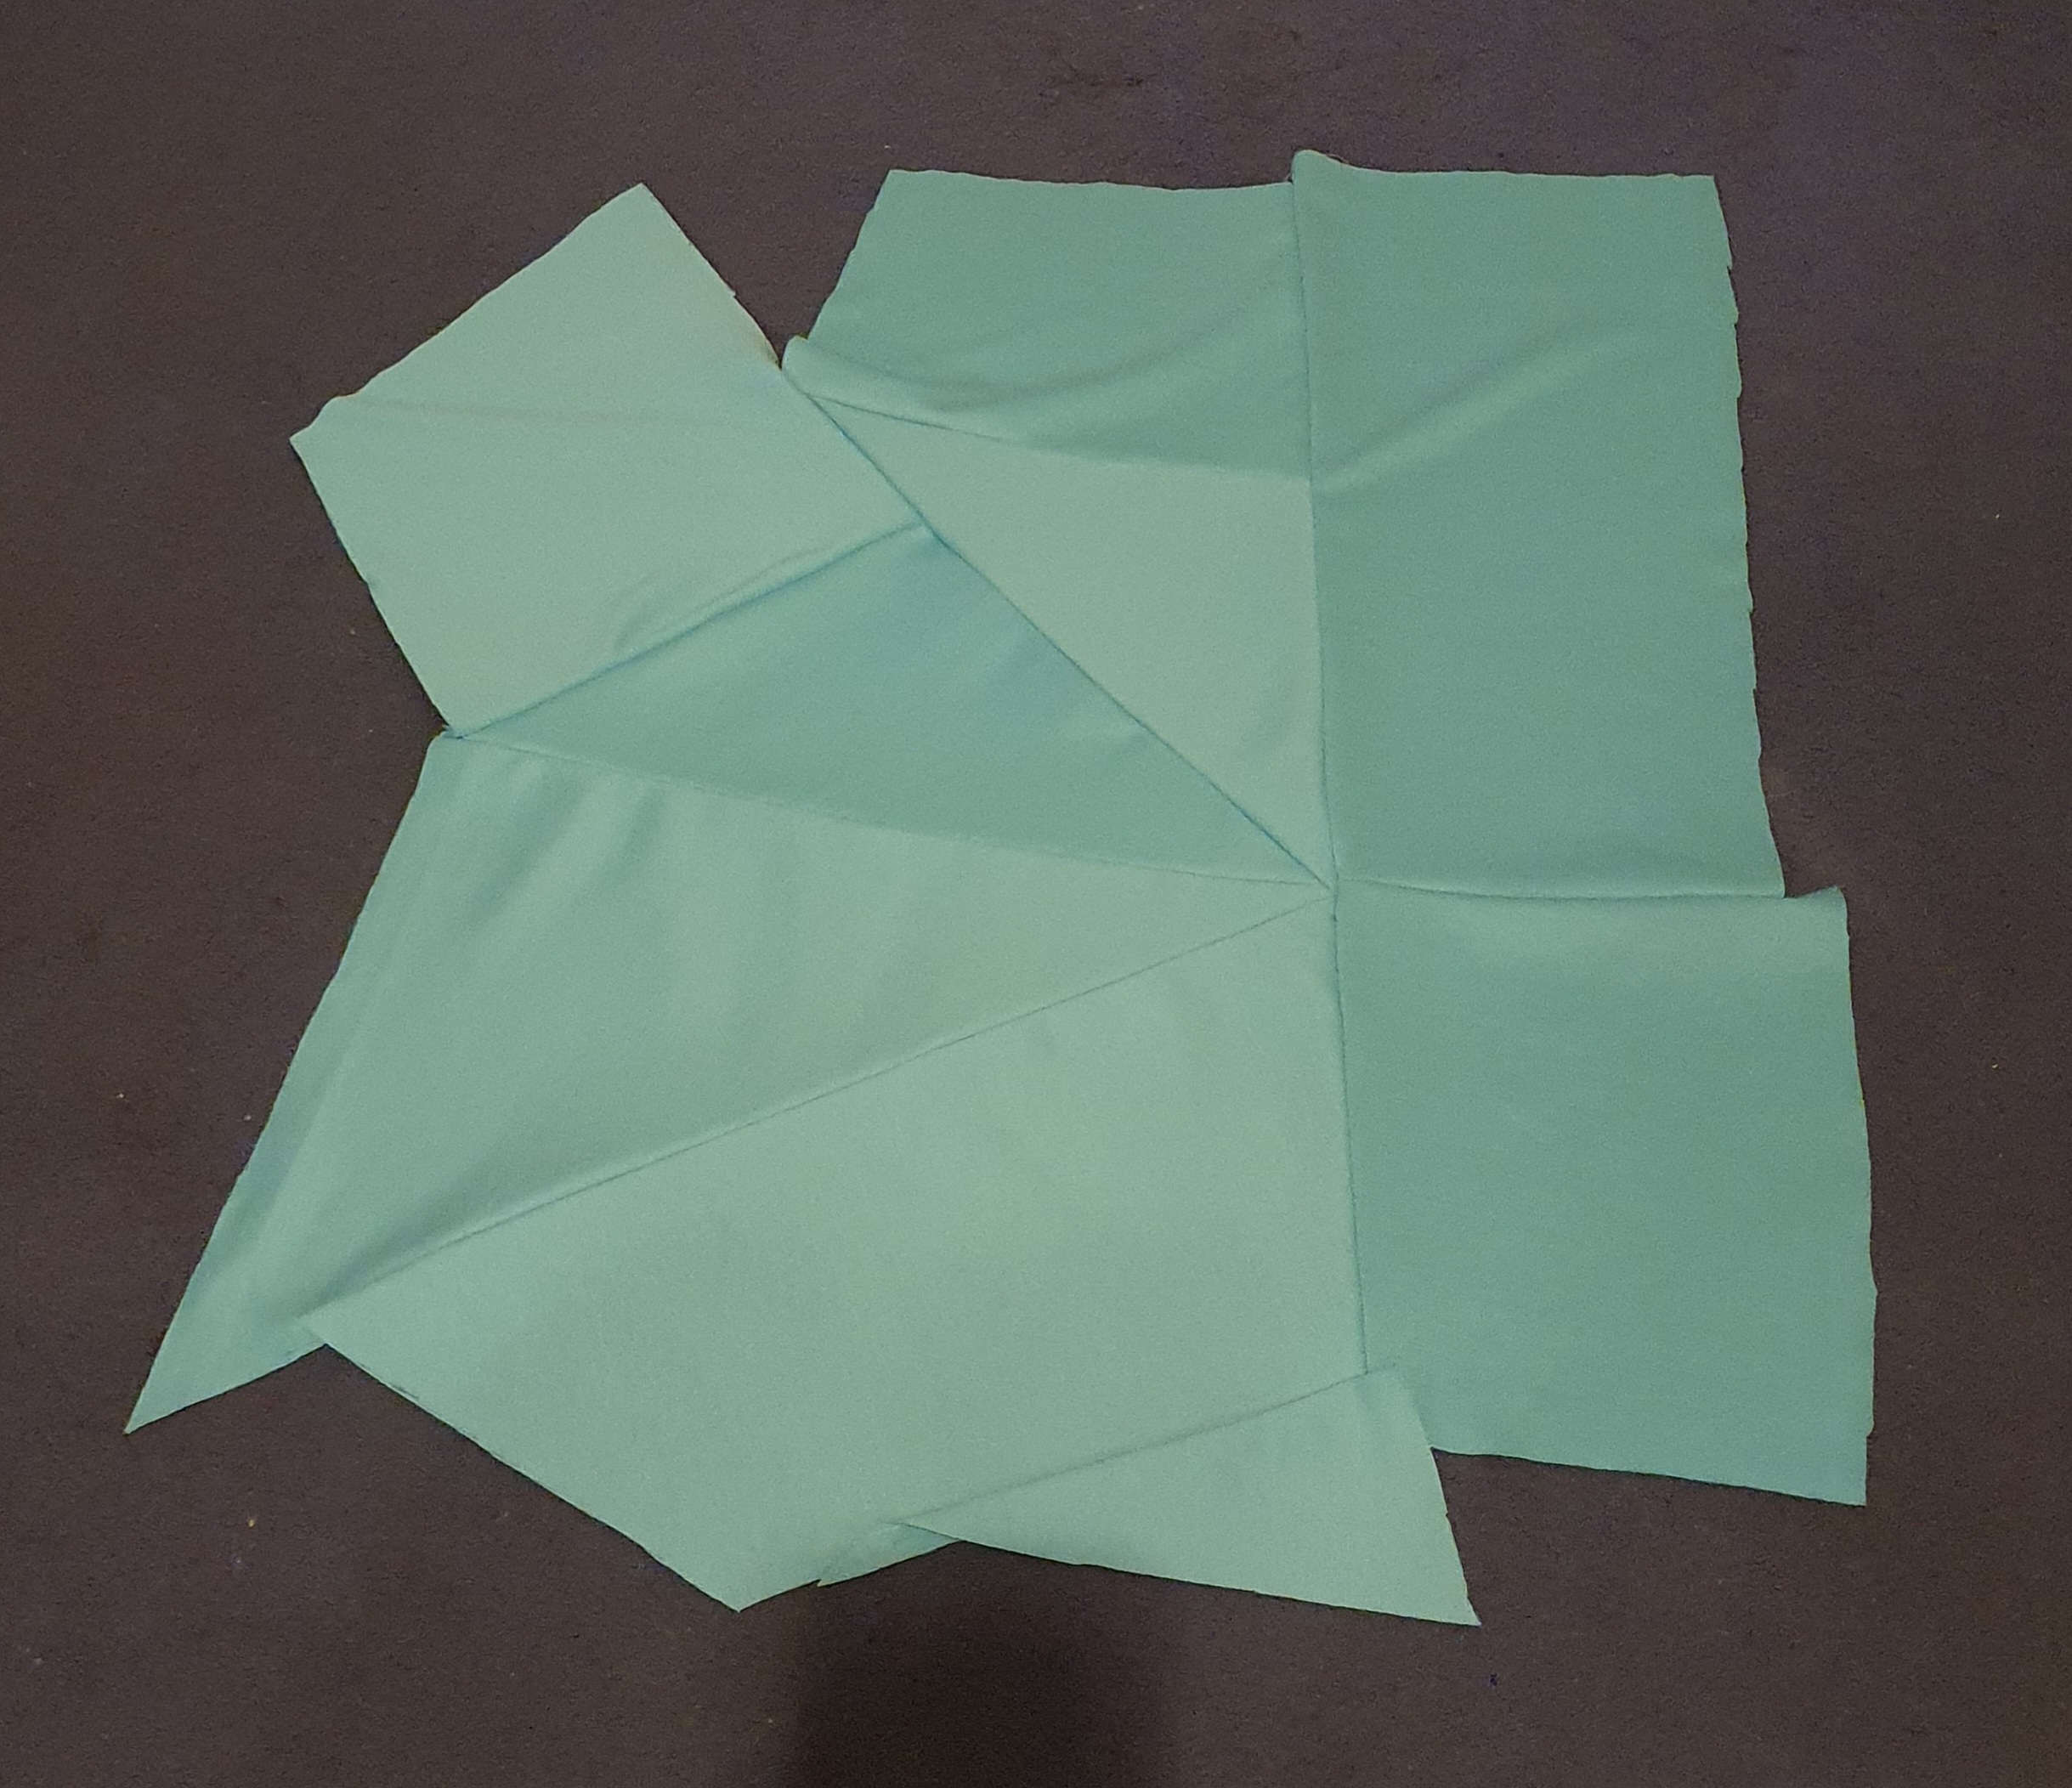
The start of the Patching
I wasn’t 100% convinced with the look I was achieving, as some of the pieces were fairly big, and I felt that if you’re visibly patching, then you’ve really got to lean into it, and make it obvious. I had two biggish sections, patched, so I cut them up a bit more and moved them around to patch them together again.
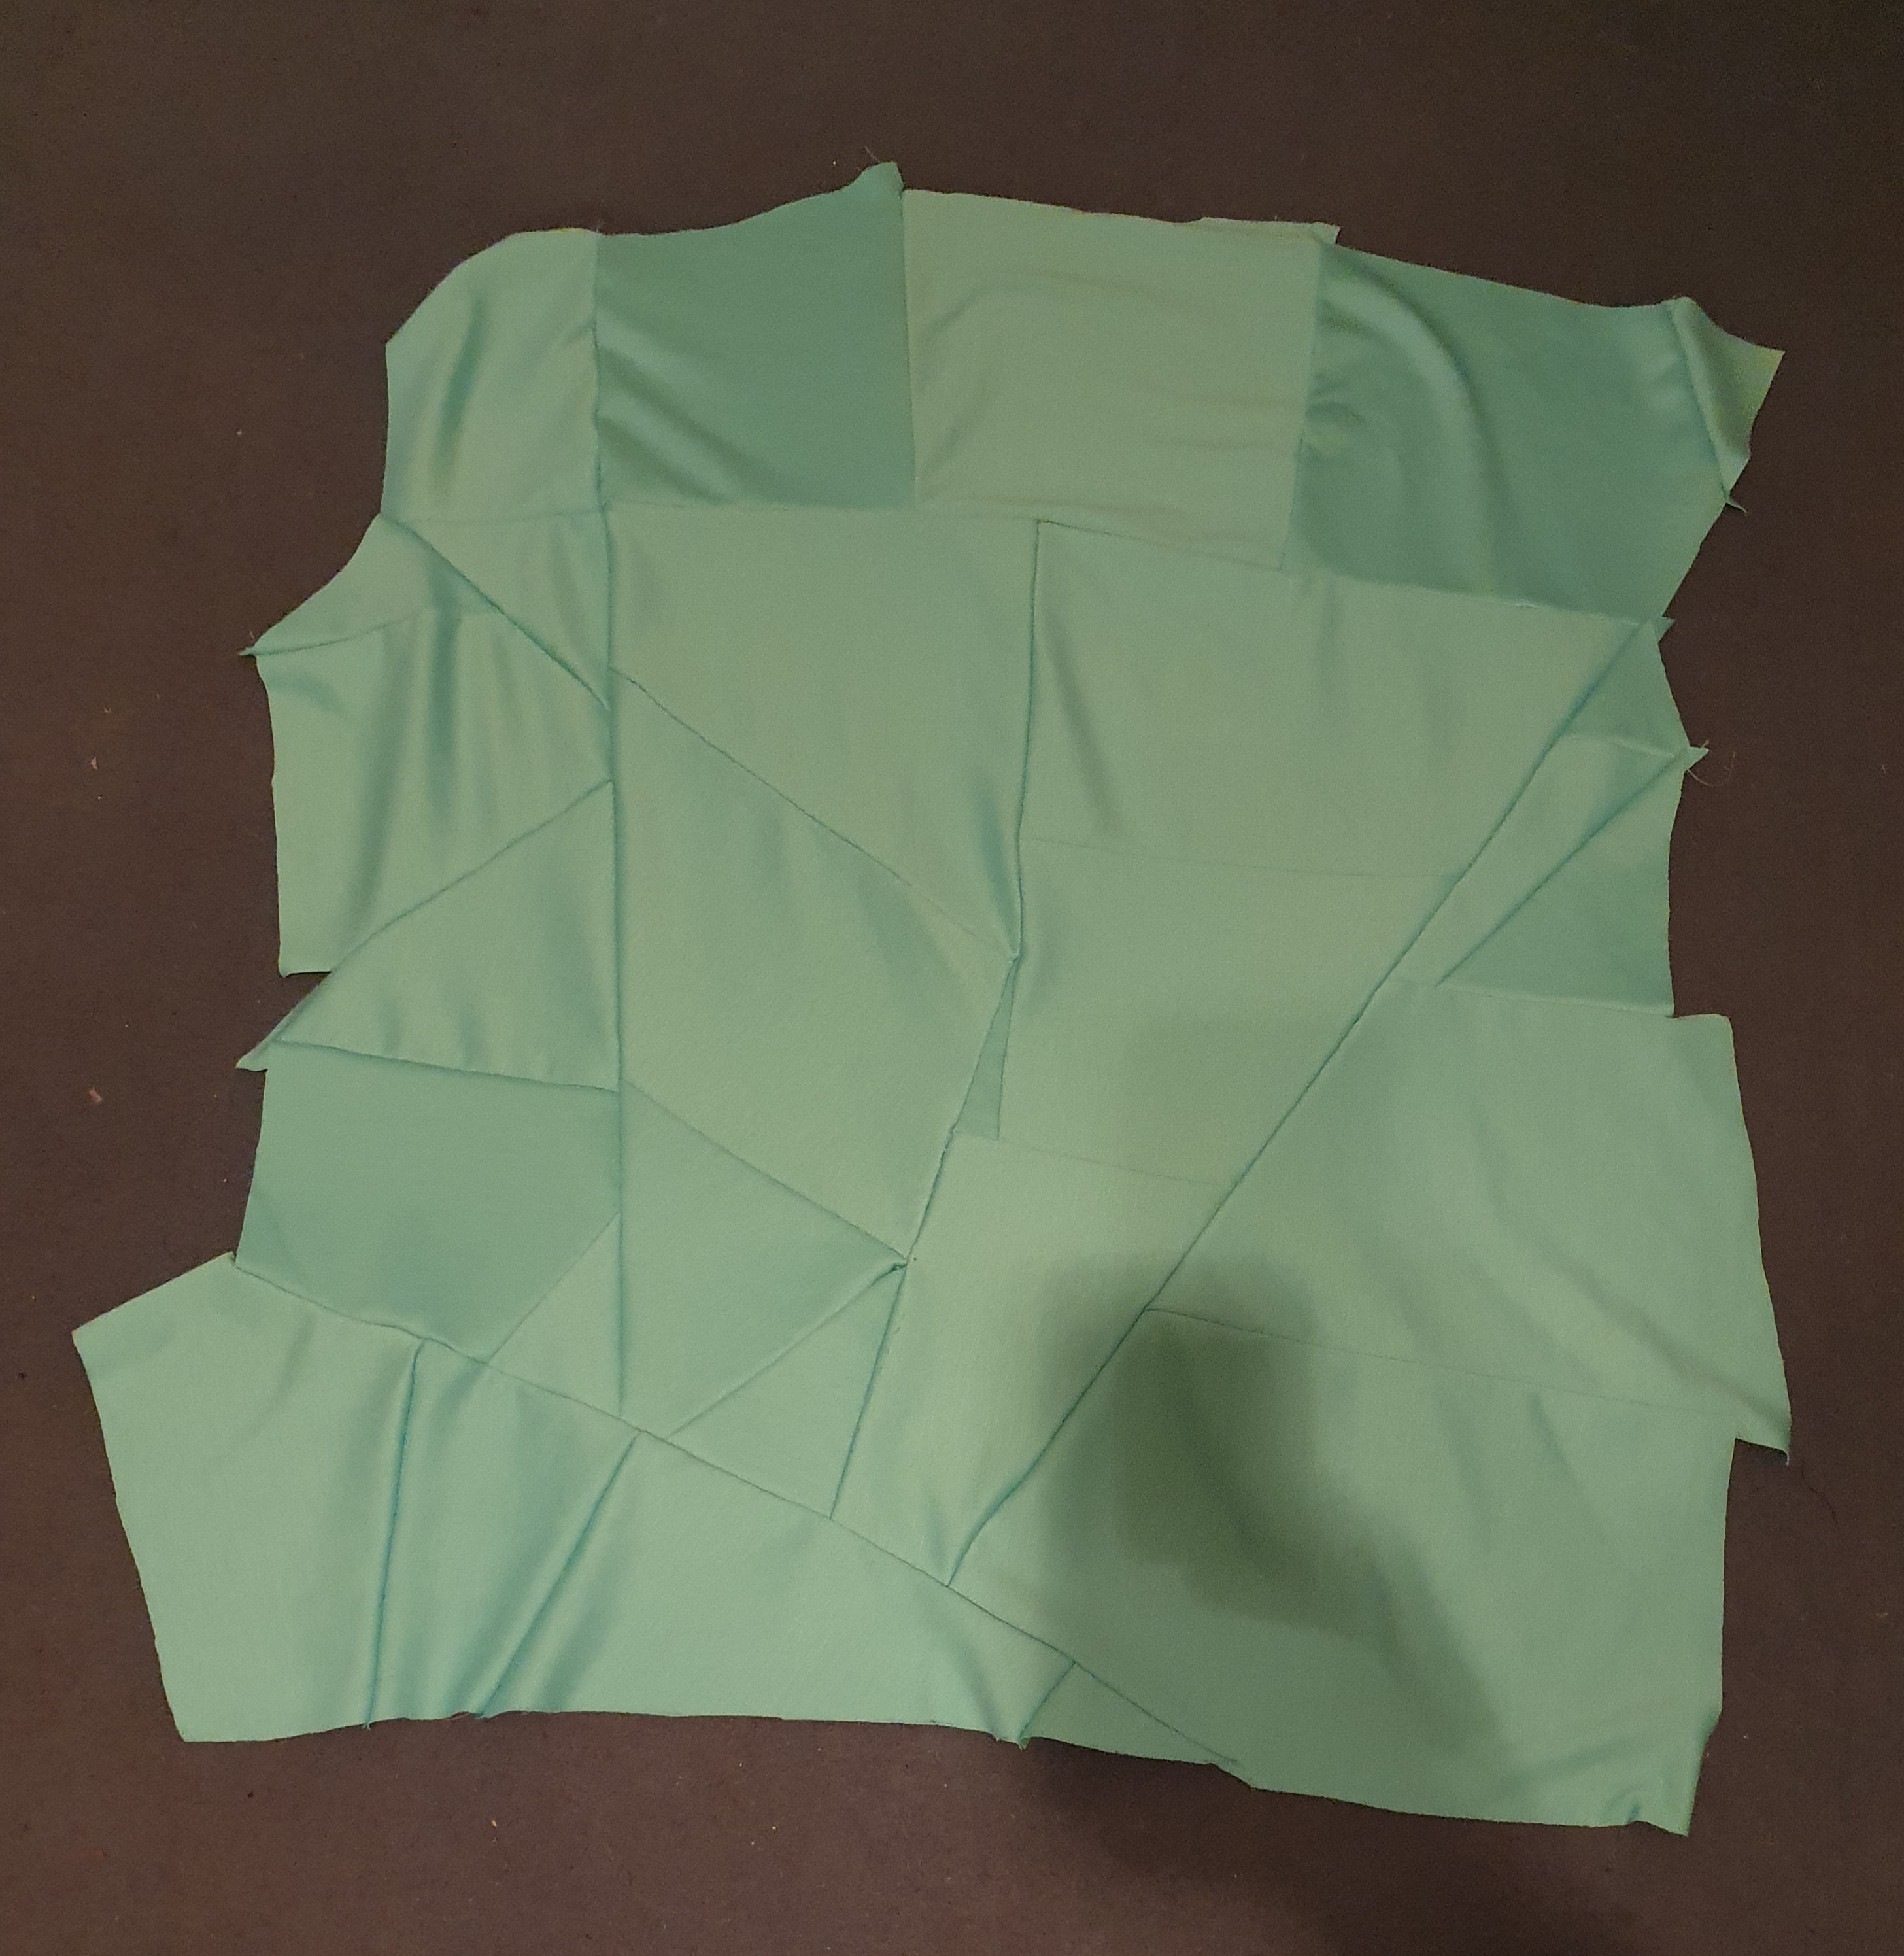
That’s more like it
I ended up with two pieces of patching each measuring 75cm (length) by 65cm (width). That was a bit bigger than I thought I would need for a skirt front and back.
I was able to cut them, using my self-drafted stretch skirt pattern, which is basically a straight skirt shape, but pegged in a bit from the hips down. I sewed the two side seams, easy peasy. Then I attached the waistband piece to the inside of the skirt, encasing the elastic.
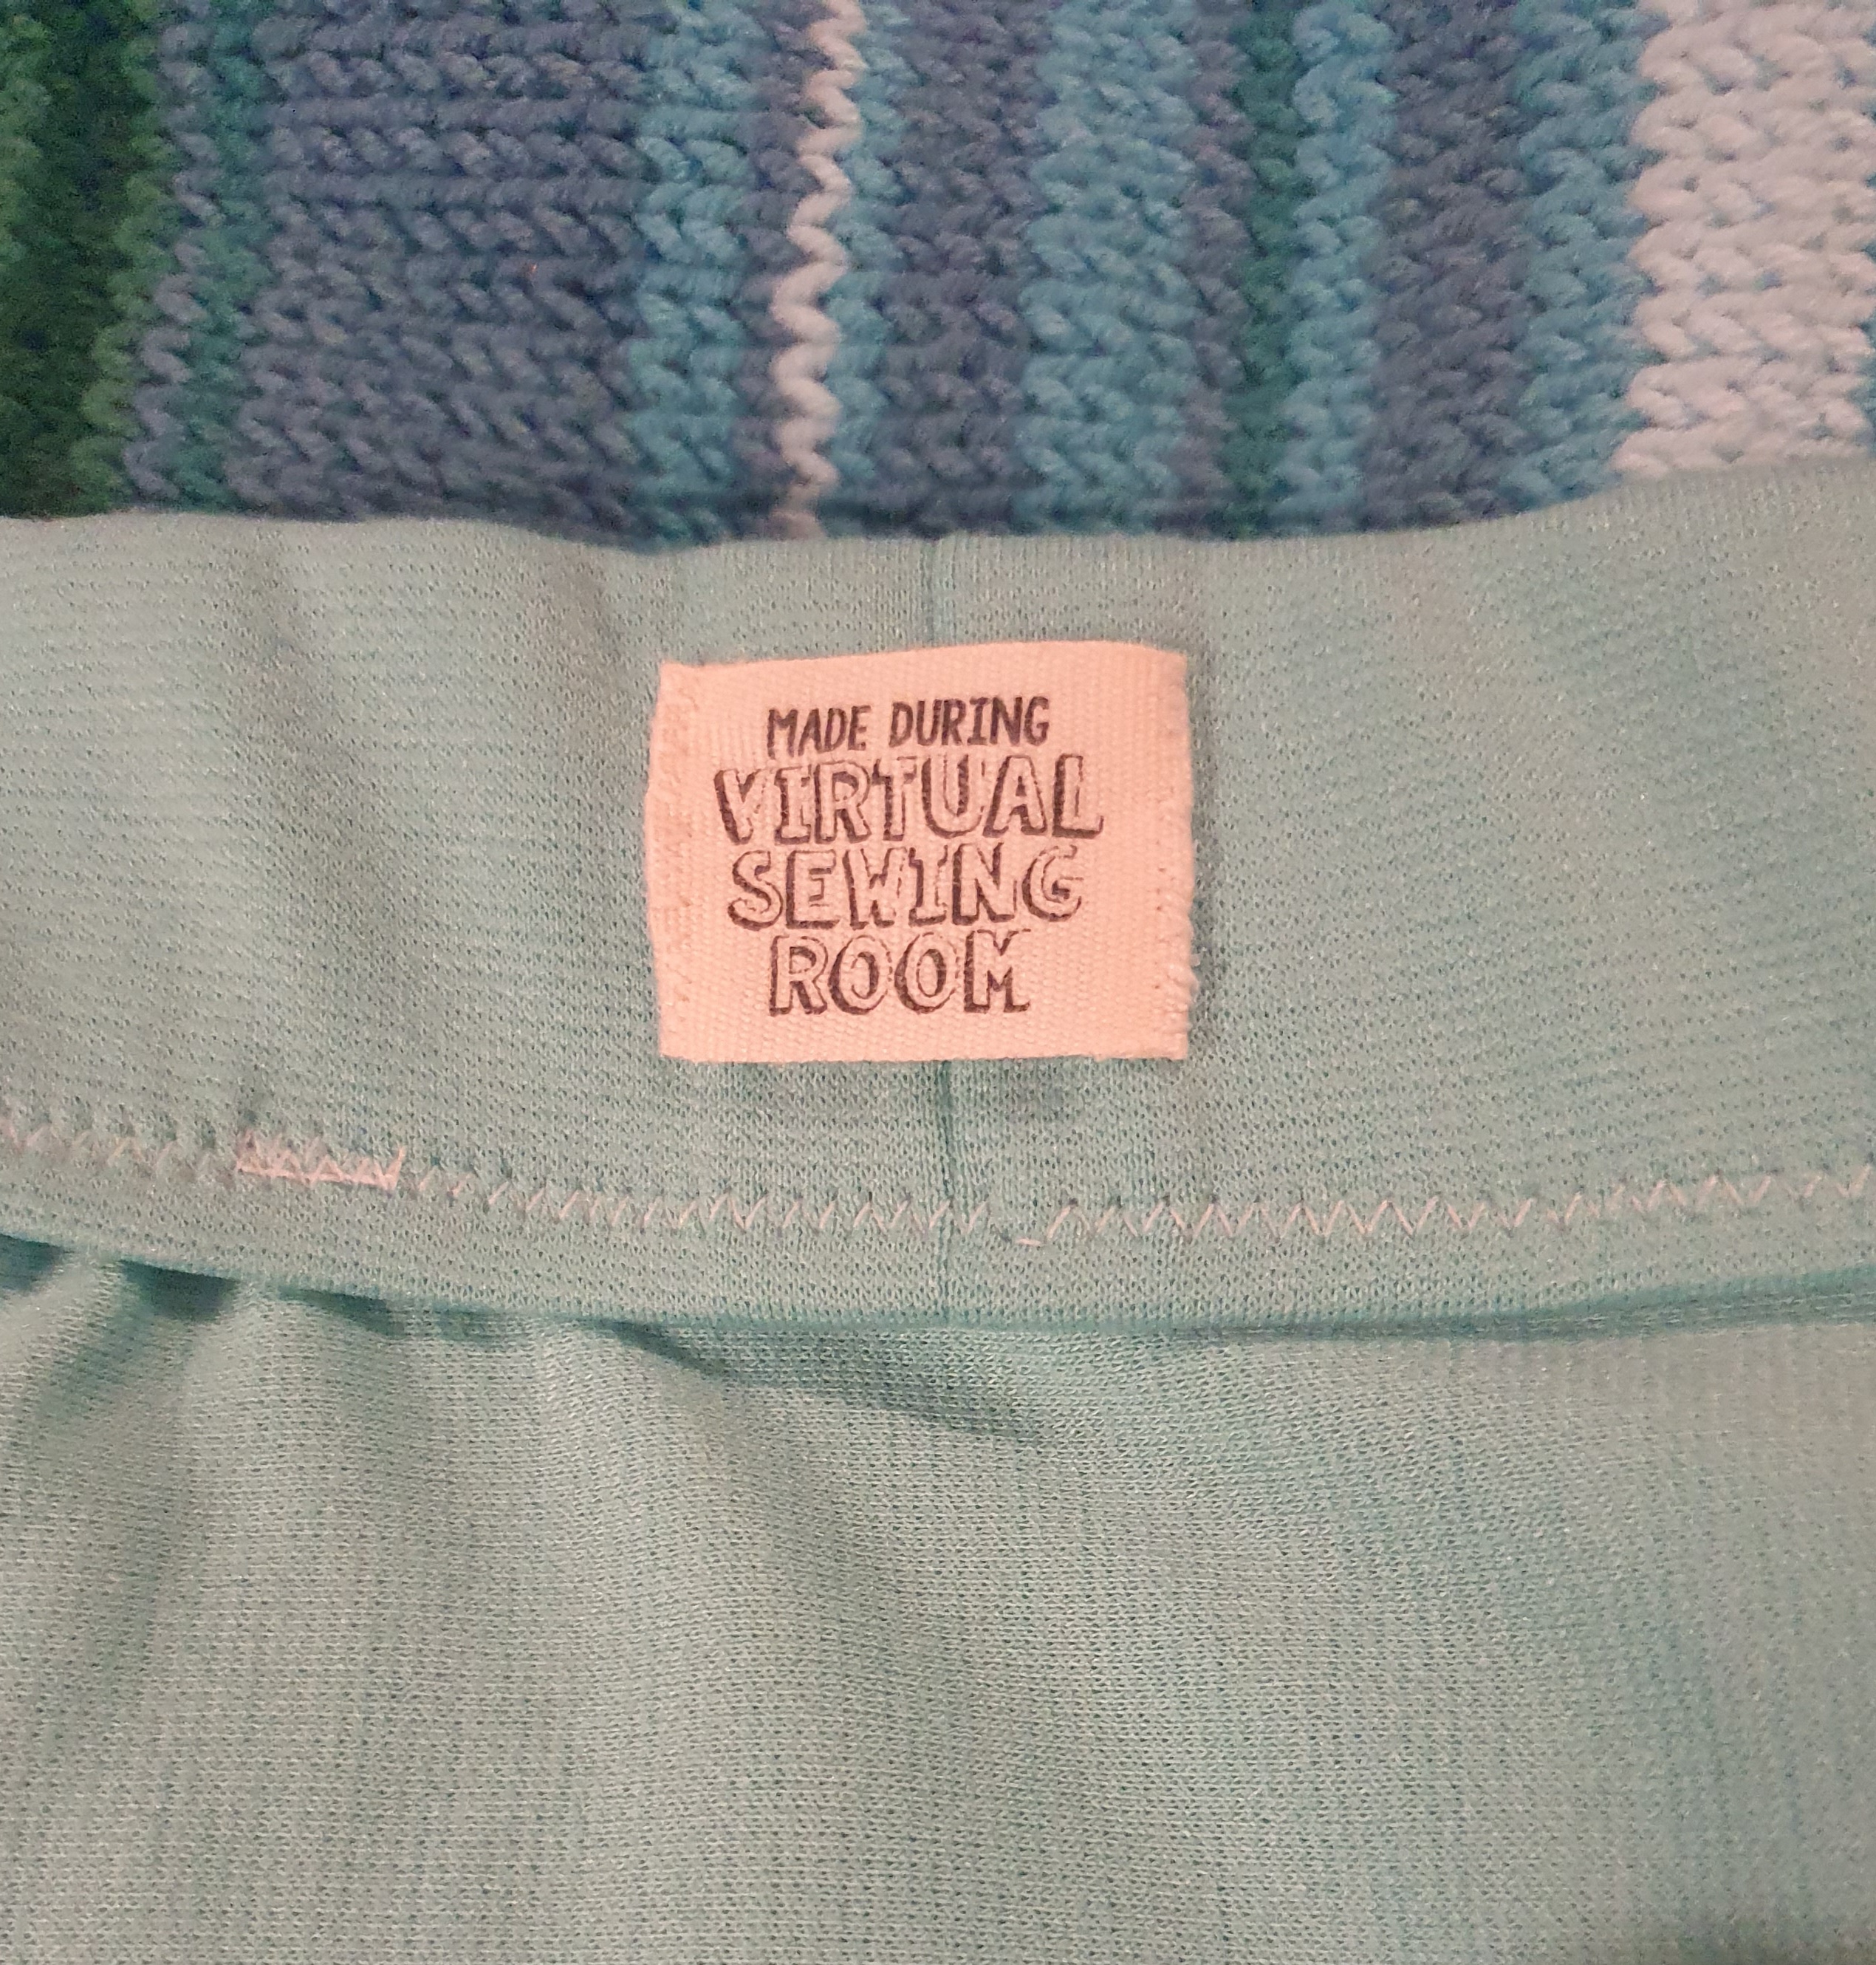
Since I have sewn this almost exclusively in the Virtual Sewing Room, I used one of my “Made in the Virtual Sewing Room” labels, to finish it off.
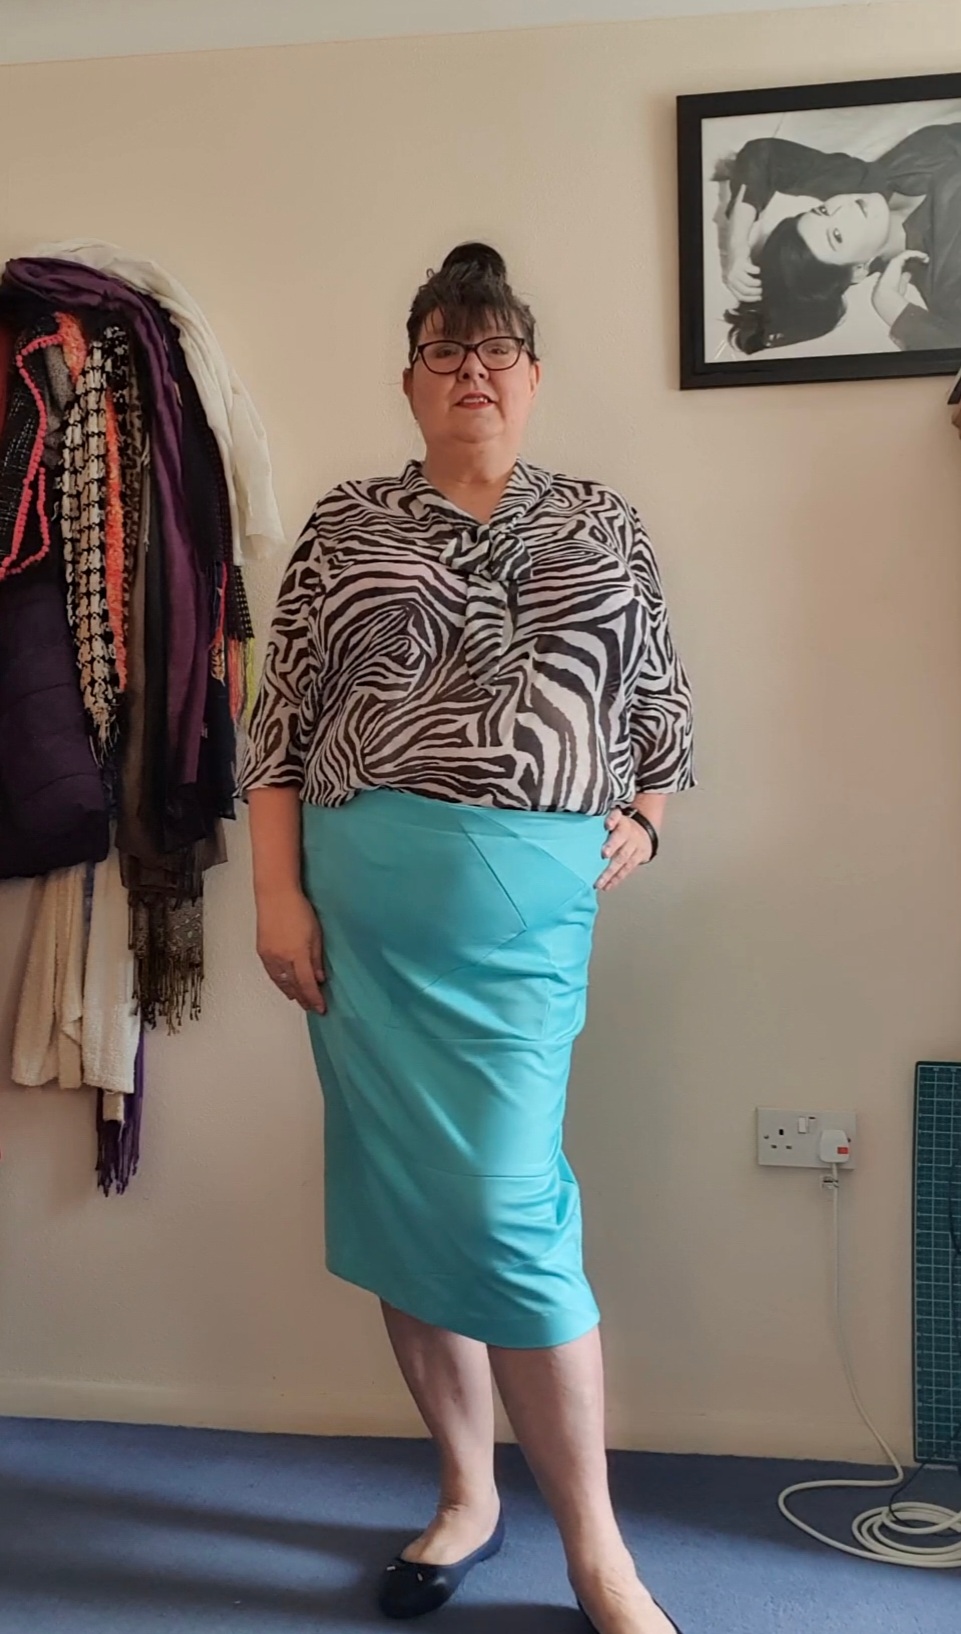
And here we are
The top made me feel all librarian-y!
I actually made this in January, and I was working out all the techniques for myself, with the guidance from Zoe’s instagram post. But recently she’s done a whole Check Your Thread podcast episode on this technique AND she’s created a downloadable guide on how to sew from scraps. Check it out!
I’ve been trying to be less wasteful in my sewing, and use my leftovers. That’s what this skirt was all about. I’m pleased with how it came together. I don’t know how consistently I can do this. I will keep cutting fabric as frugally as I can, so that I can either use my leftovers for another project, or Fabric Swap them. I’m not aiming for Zero Waste Perfection, but Minimal Waste Good.
Mend March is out of the way, so I’m on to the next Challenge month!
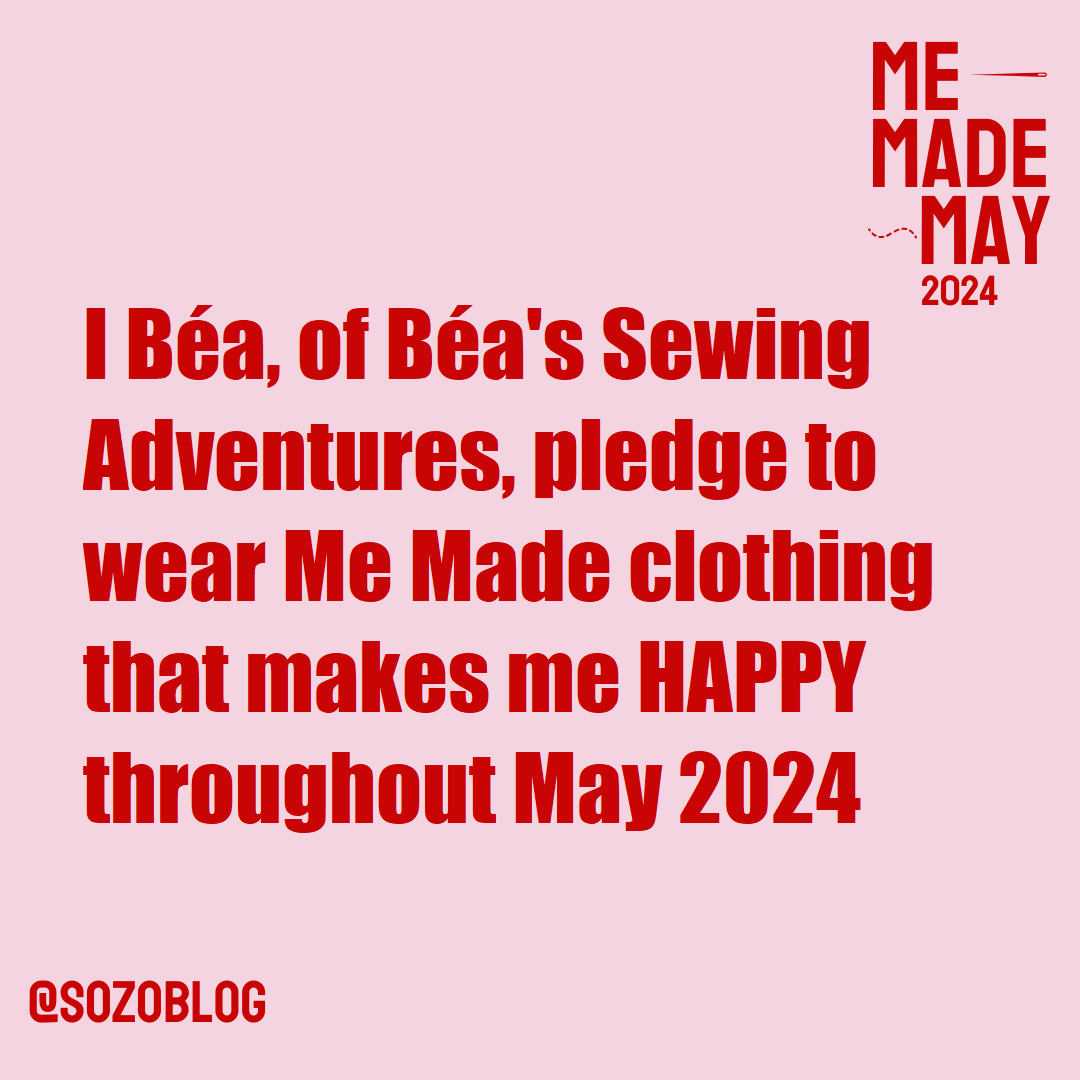
I’ve been doing Me Made May, hosted by the wonderful Zoe of So Zo What do you know? and Check Your Thread, for 10 years (with varying degrees of success), and this will be my eleventh year. Eeep! It gets harder each year to find a new way to make the challenge meaningful. But I think I’ve got it sussed for May 2024.
My wearing habits are very lazy. I wear dresses because that’s just a single decision to make in the morning. Separates require deciding on one garment, then deciding on a second garment to go with it. Too much for my morning brain! But I think I could benefit from dressing in a more positive, thoughtful way, so I’m going to focus on wearing my me-mades that make me happy. Dopamine Dressing! I’m going to photo-document each day’s outfit on my Instagram Stories (saved into a Highlight), and record why the outfit makes me happy, so that hopefully by the end of the month, I’ll have a better handle on what I love to wear, and what I don’t.
I’m also going to treat MMM as an opportunity to carry on with my mending and fixing up of whatever wardrobe items need it, but I’m not goalifying this one. Also, as in previous MMMs, I’m going to like and comment on other MMM-ers’ posts and images on Instagram, because for me it’s all about building the community. But again, I think that’s just a good habit, I don’t need to make it a specific pledge.
I’m feeling very positive about my pledge and looking forward to seeing what everyone else is doing.
I went into Mend March knowing I was unlikely to meet all the daily prompts. I’ve tried enough of these monthly challenges to know I’m not very good at them! But I did a lot of mending and fixing up, and I posted 20 times, and as the late great Meatloaf once said, Two Out Of Three Ain’t Bad.
I mended more than I posted. I fixed a few holey tights. I’ve renovated several pairs of knickers and two bras, bringing them back to comfortable wearability.
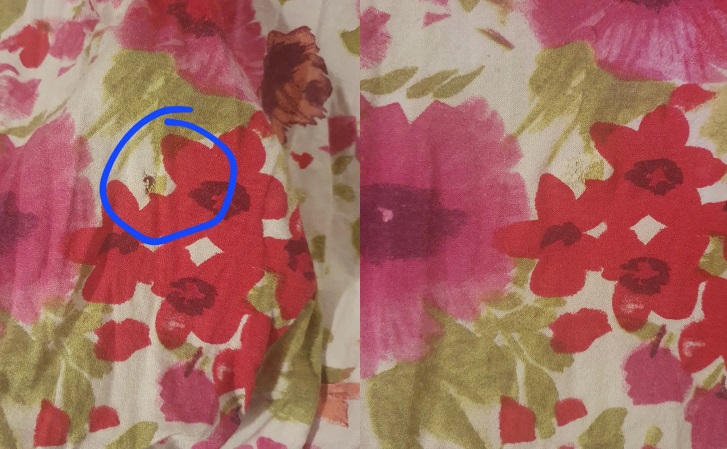
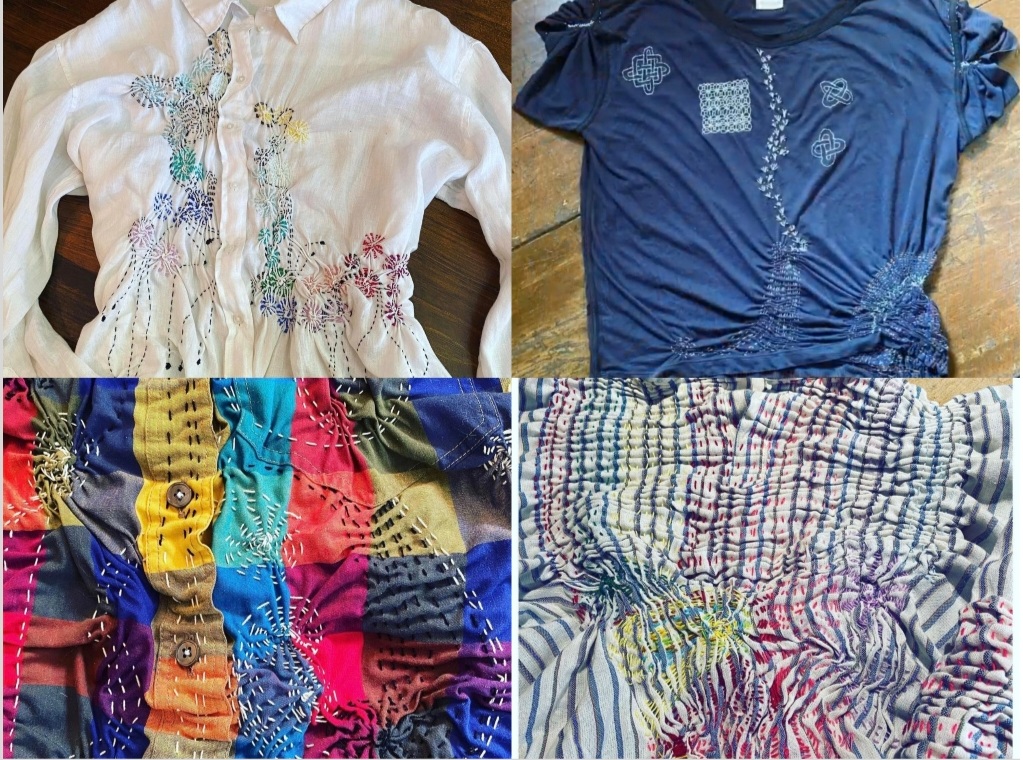
But it wasn’t all undies – I fixed a hole in a dress (that was right on my bum).
Holey dress fix, Batman! Sorry – as soon as the word Holey was there, I knew there was going to be a Holy [something] Batman reference. I’m a child of my time… Anyway, clicky for a bigger picture, to see the full detail of how well fixed up it is
I updated the neckline of a dress that I made quite recently, that had ended up a bit too gapey. I had some leftover fabric left, so I gave it a neckband. More of a Fix than a Mend, but it still counts. It makes the dress a lot more wearable.
I did the Punk Smocking to fix another dress with a gapey neckline.
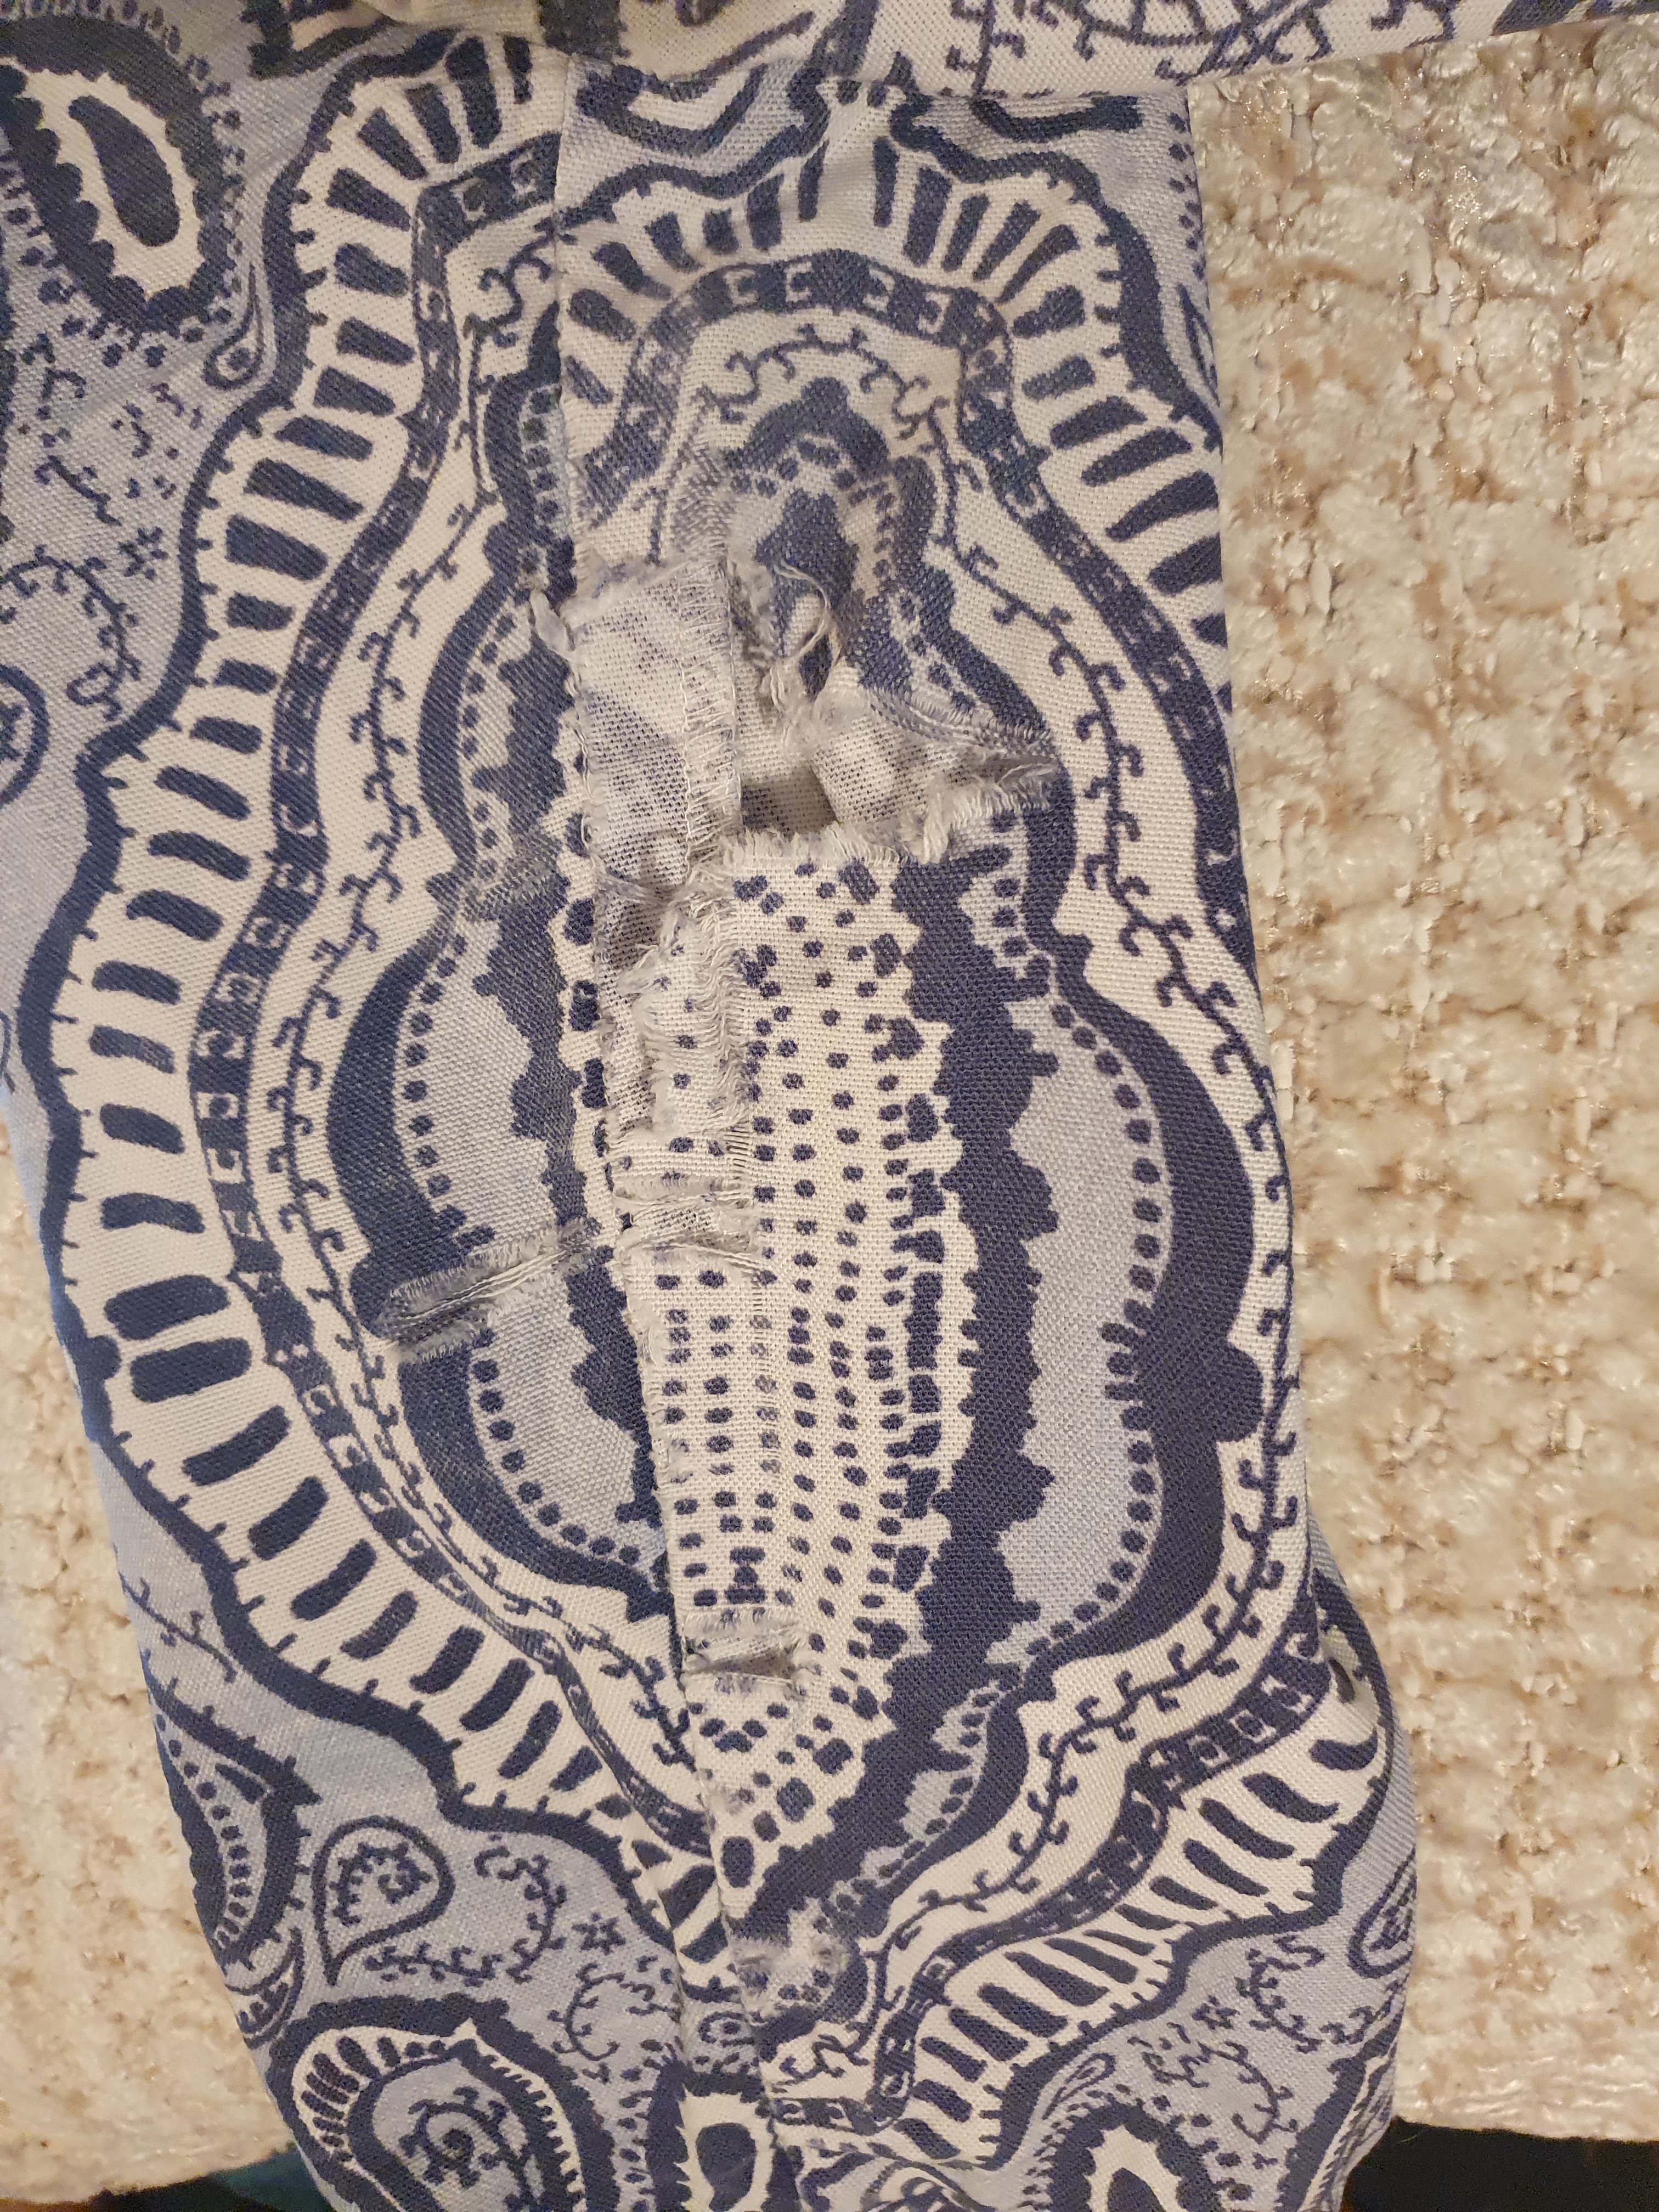
I also got started on tackling a Big Scary Mend that had been scaring the pants off me, for the last couple of years. I made a lovely Sew Over It Zoe Dress back in 2017, using a completely bonkers Massive Paisley print**. Somehow, at some point, the fabric in one sleeve got thoroughly shredded. The other sleeve is fine. It was such a mess that the dress has been hanging in my wardrobe all this time, waiting for me to get the courage up to do something about it.
Before – you can’t tell from the photo how scraggy all that shredded fabric is!
The whole spirit of Mend March had given me enough confidence to at least give this a try. I decided to start at the cuff, which was a bit worn, and just gradually move upwards. And it turns out, it’s not scary at all. I could do it all with basic darning and a bit of lining fabric to hold everything together. It’s a cross between visible and invisible mending. It’s visible but camouflaged by the bonkerness of the print!
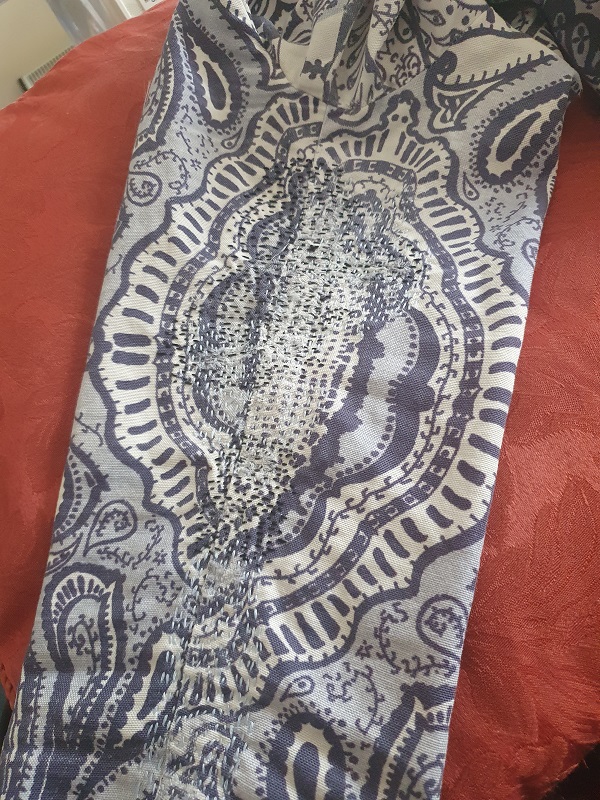
After. Well technically it’s still During, because there are some other bits in the armpit and bodice that I want to reinforce, but all the shredded fabric has been tamed!
I was also happy that I was able to do this using thread and lining fabric that I already had in stash. Because this post may be all about #MendMarch2024, but I’m still very conscious that I’m also doing #LastSewistStanding. I’ve managed to keep in the Heavyweight division. My main motivation is not disappointing Miss Taeschli! And mending is very much in the spirit of LSS – it means you’re using what you’ve got to avoid buying new stuff.
I’m happy that I’ve got a load of other menders in my feed now, to inspire and encourage me. I’ve got more techniques to experiment with as my mending journey continues. So Mend March has been a Big Win for me! Big thanks go to Kate Sekules (@visiblemend on Instagram) for setting up the challenge in the first place, and running it throughout March this year. It’s been a massive inspiration to me.
We all thought this would be the last one, because of Instagram’s stupid hashtag policy making it really difficult to follow tags. But we coped this year with microtags for each day, and Kate has confirmed Mend March will be back in 2025, so that’s a lovely thing to look forward to – Hooray!
Mend March may be over, but that doesn’t mean the mending will be going away! I will continue to rummage through the underwear drawer, to make sure I’m fixing up holes, adding new elastic and replacing worn gussets*** as needed.
* And I use the word advisedly! ** You might see other images in that Paisley print – I couldn’t possibly comment. *** Gussets! Fnur, Fnur!
My latest Instagram crush is Kate Sekules, @visiblemend on Instagram. She is a champion of mending and fixing, and one of her mending methods is Punk Smocking.
I’ve stolen some images from Kate’s Instagram, to demonstrate. Happy to take down, Kate, if you don’t approve.
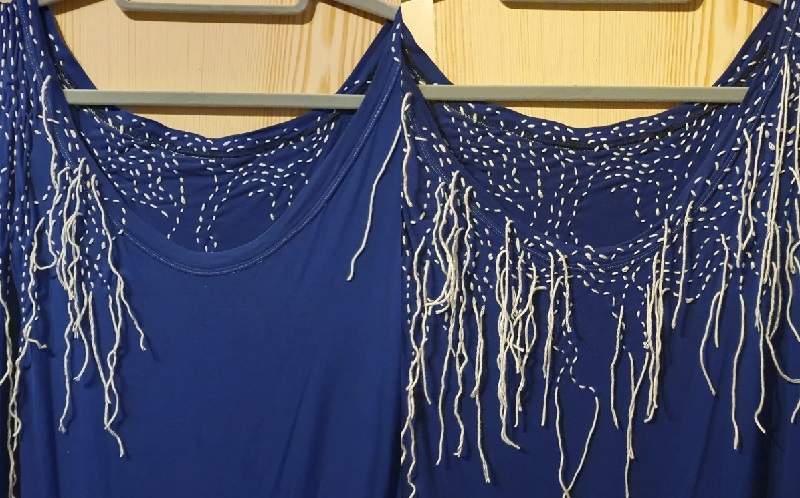
It’s a great way to change the shape of a garment in a gloriously decorative way. So one of my Mend March projects was to use punk smocking as a way to bring the stretched out neckline of this very old T-shirt dress back into shape.
Since I’m still on the #LastSewistStanding No Buy challenge (I’ve done over a month, go me!), I checked my yarn stash and picked out a pale green cotton yarn. I also thanked past Bea for having acquired some tapestry needles with a big enough eye to thread the cotton yarn, and a sharp enough point to go through Jersey.
Kate hasn’t given us a tutorial for punk smocking as such. But it seemed pretty free hand and intuitive. What could possibly go wrong?
Nothing. Nothing went wrong! I took three evenings to do some random stitching around the neckline, leaving long tails. The only rule I gave myself was not to get my wires crossed, because regular smocking doesn’t cross threads.
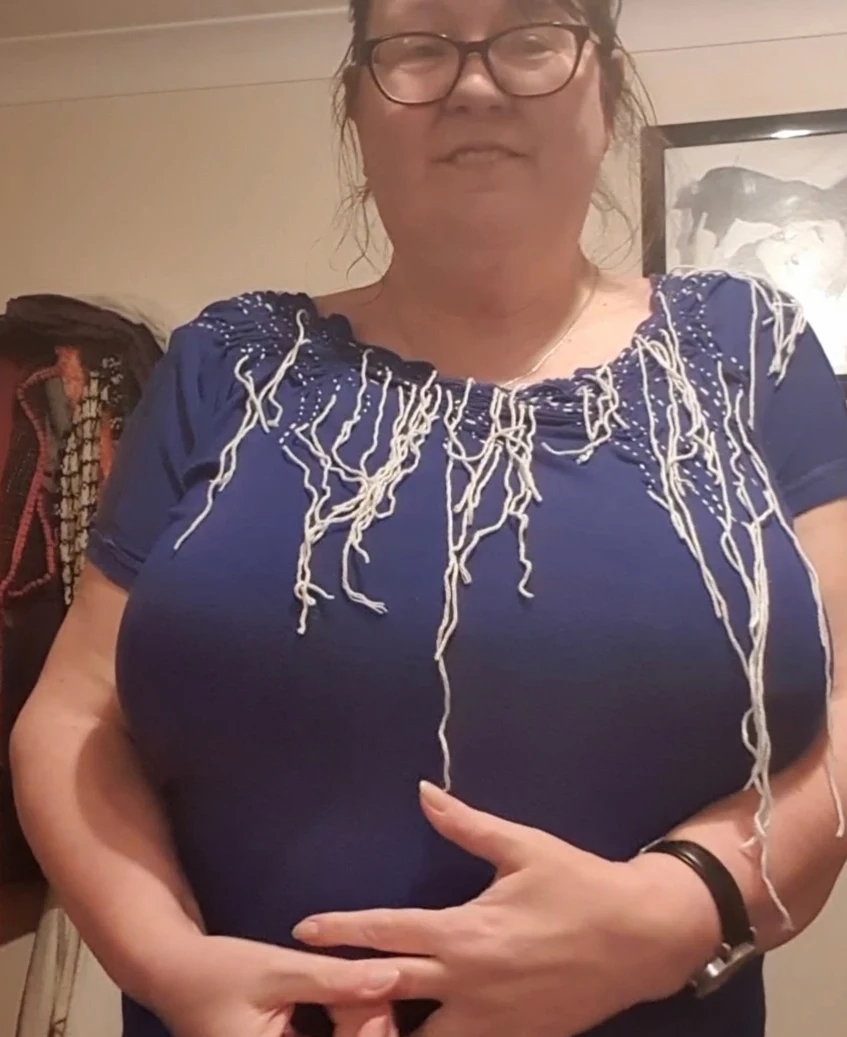
I’m not gonna lie, I was a bit nervous about pulling all those threads. What if I had completely misunderstood how it was supposed to work? What if it looked stupid? But I was really happy with how it turned out!
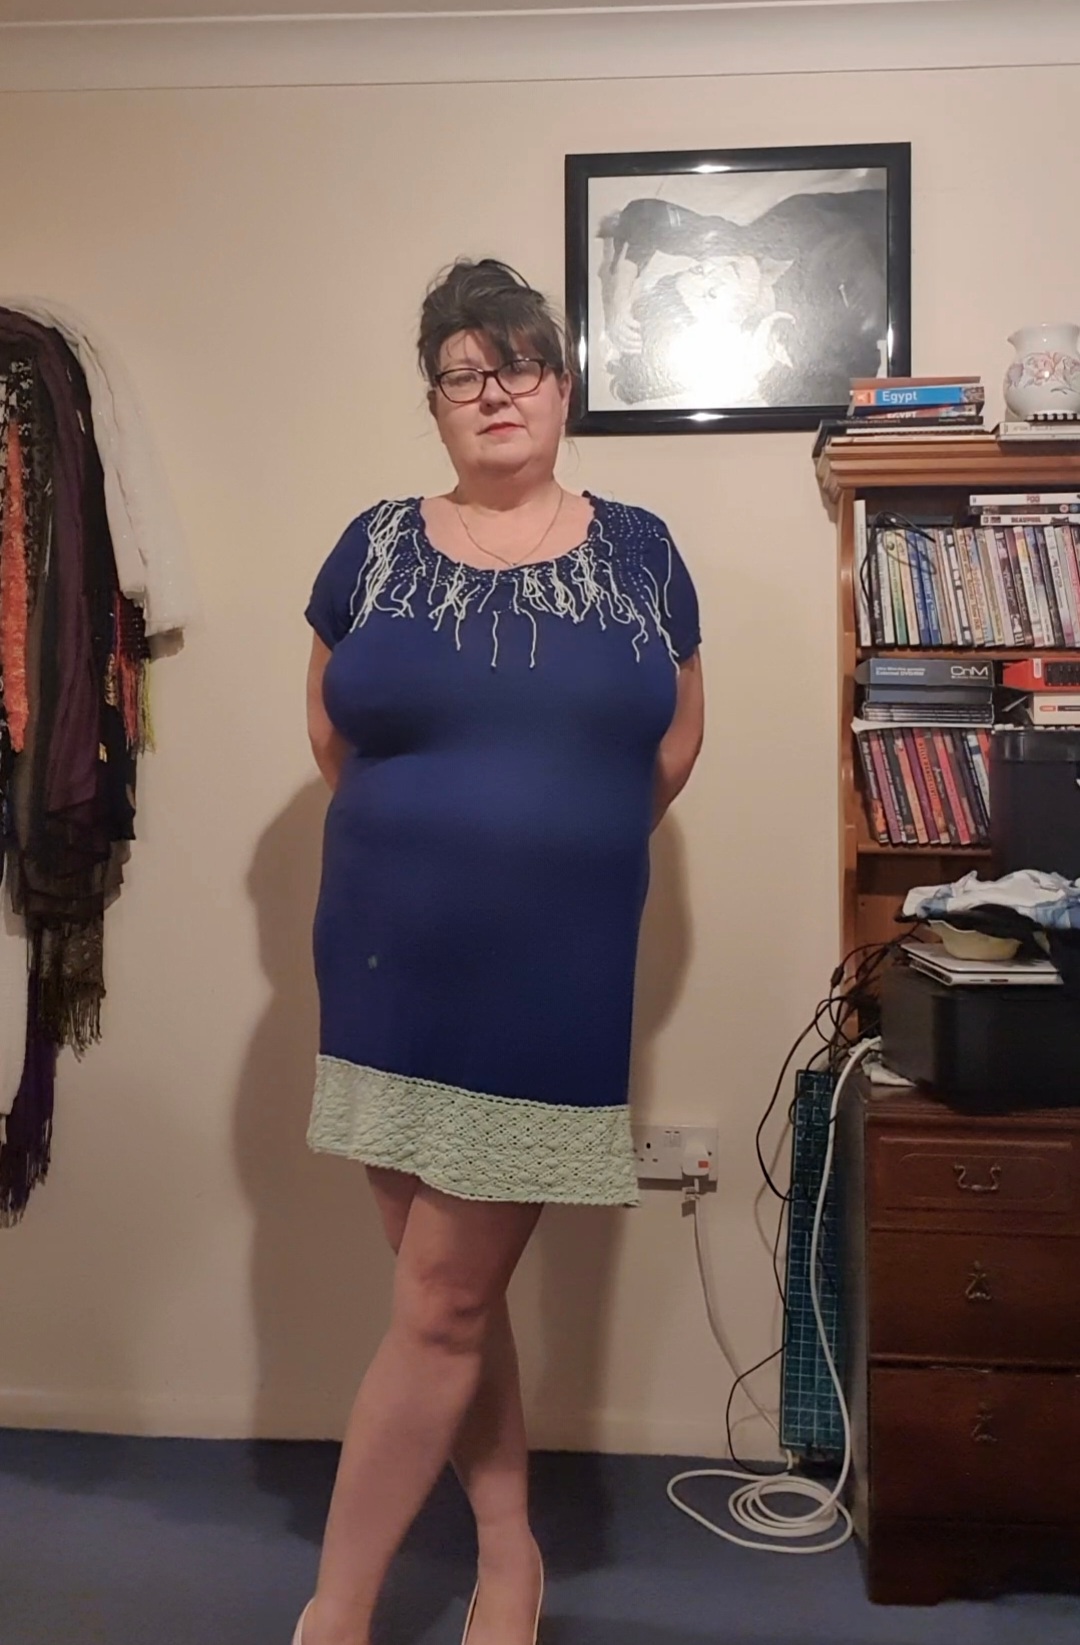
Yay! It worked!
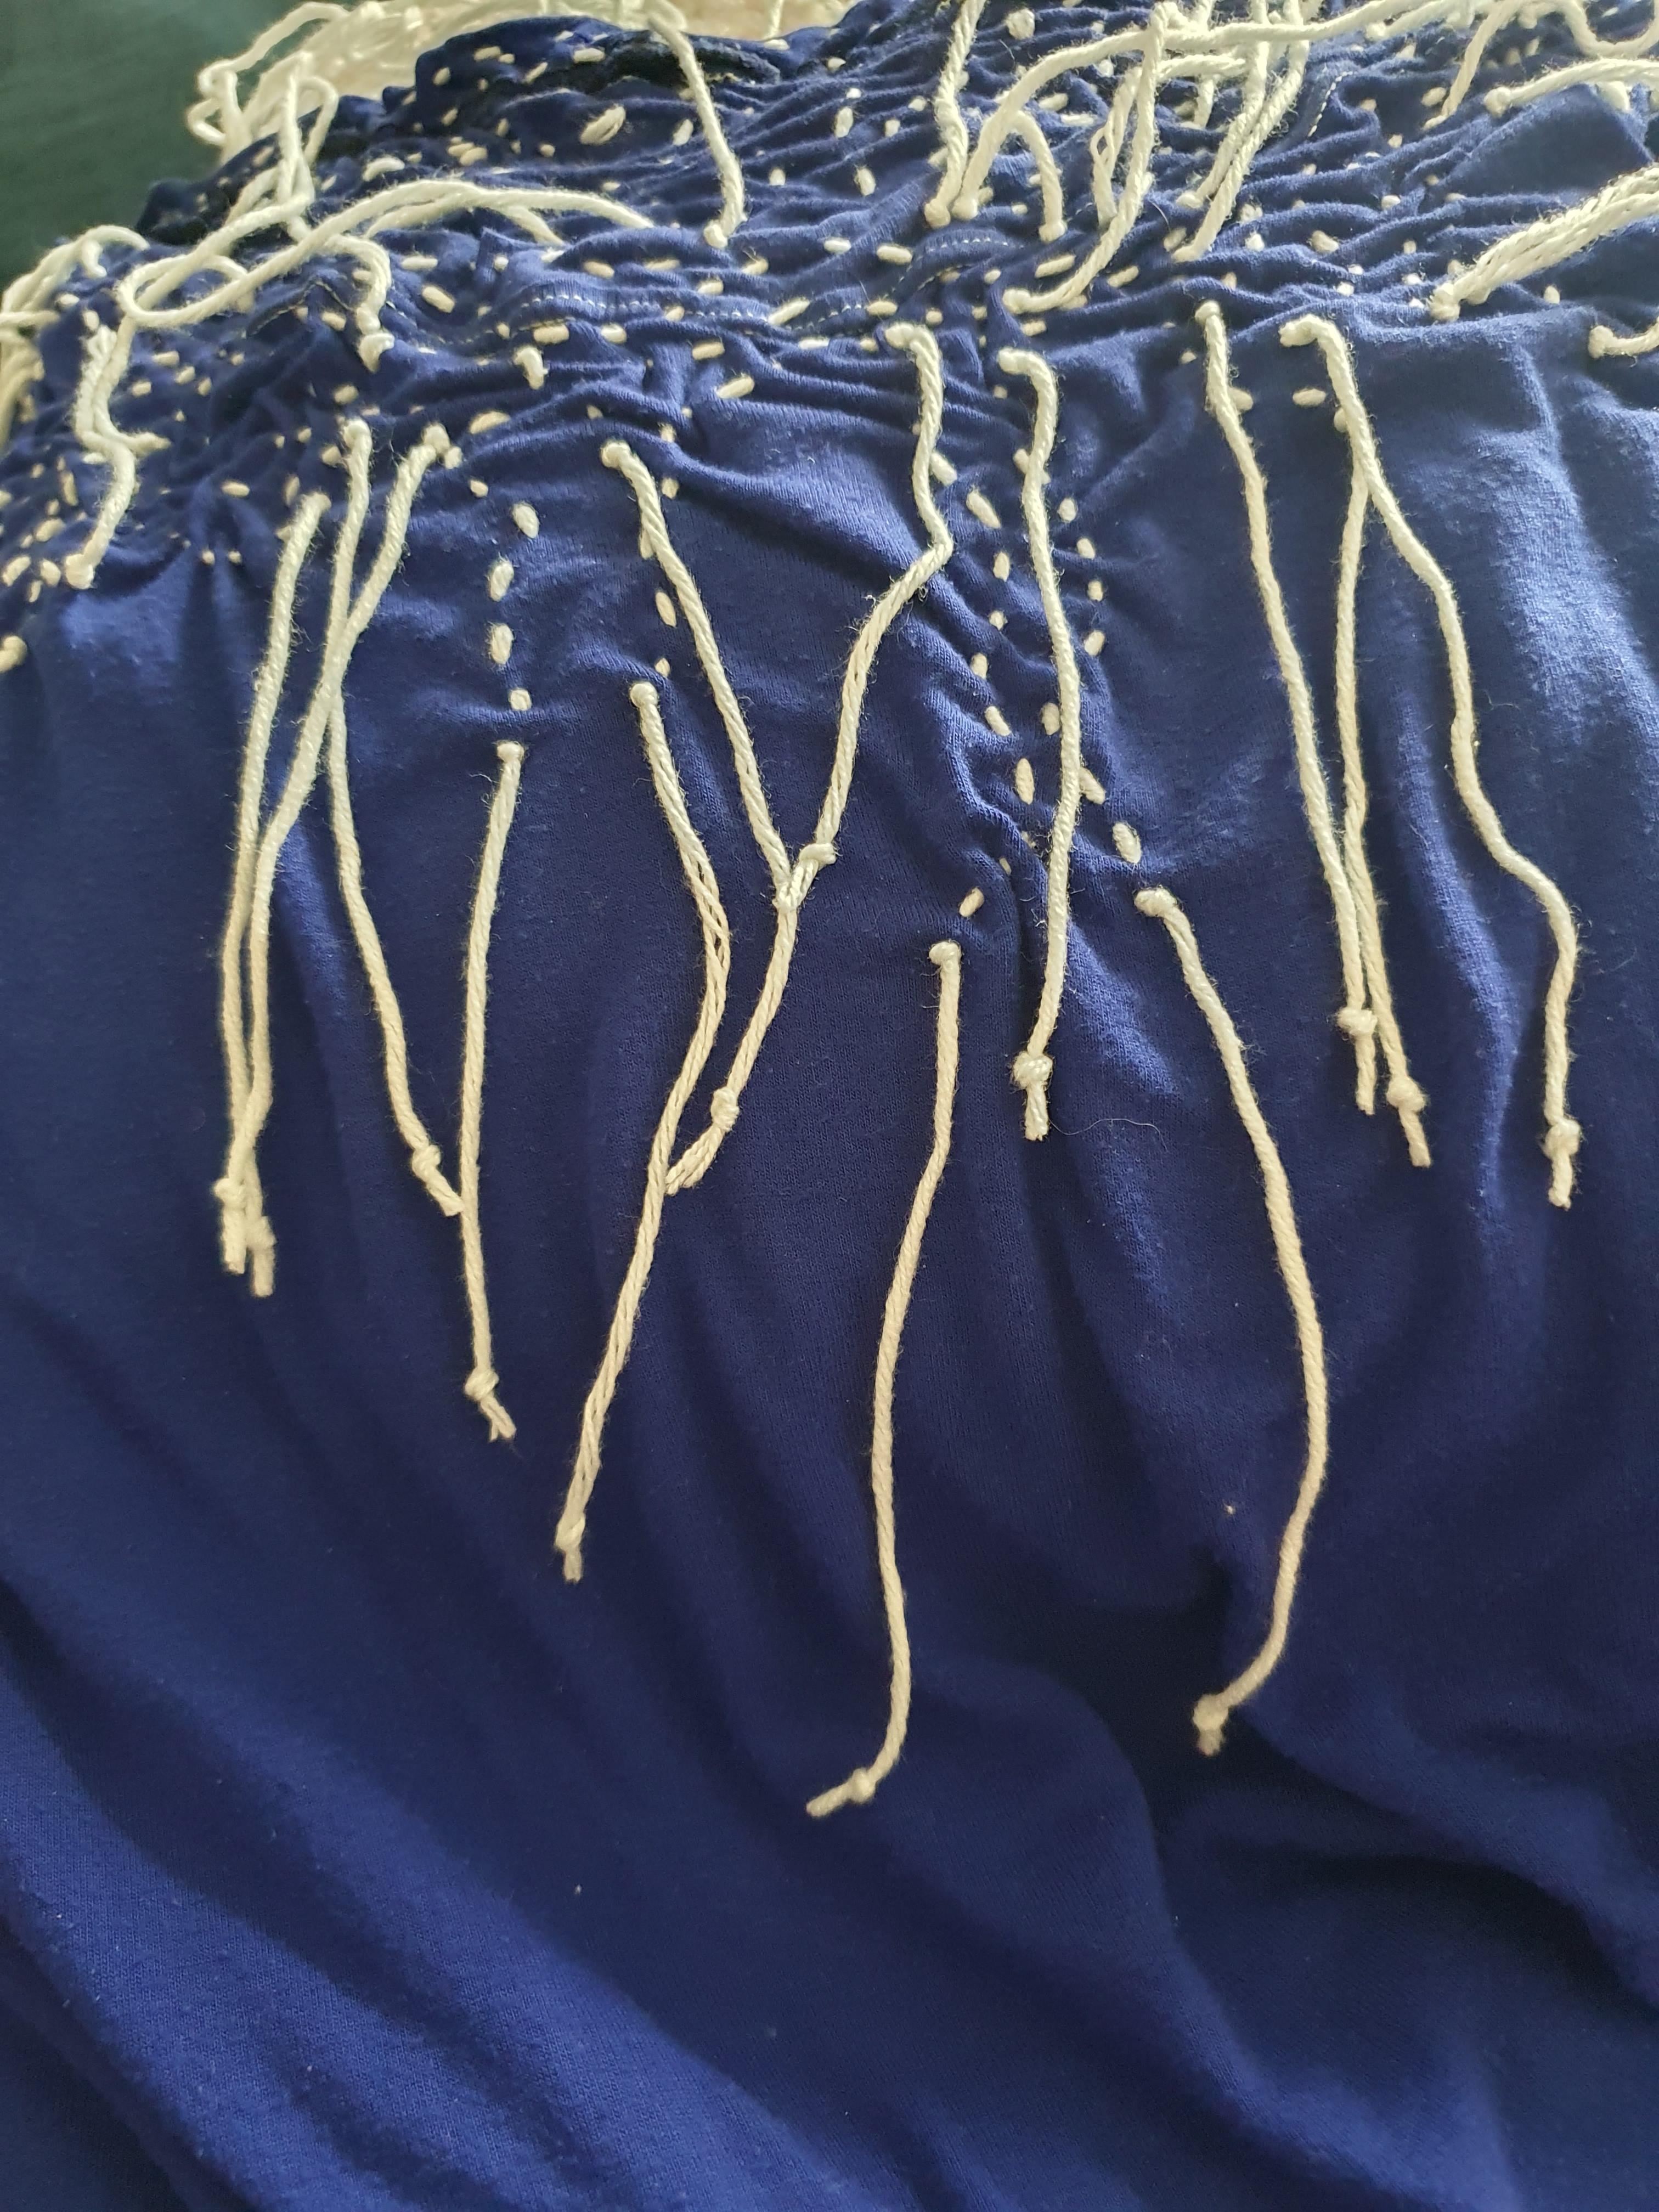
I did a marathon session of knotting off the threads to keep the gathers secure. Then I did another round of trimming the tails to approximately 10cms, and knotting the ends to avoid them fraying in use or in the wash (216 knots, if you’re interested).
No sooner do I take on one challenge (Last Sewist Standing – update: I’m still standing, despite being ambushed by all the beautiful fabric shops of Goldhawk Road last weekend), than I go crashing headlong into another…
This month is Mend March, a challenge set up and hosted by Kate Sekules, aka @VisibleMend on instagram. It celebrates all the beauty and usefulness of mending your clothes.
This may be the last Mend March, Kate warns us, because of Instagram being so rubbish about hashtags at the moment. Maybe the algorithm will be tweaked, who knows? I really hope it won’t be the last.
So why did I commit to this? I’m trying to be more thoughtful and considered about my impact on the planet. I’m no Greta, but I’m trying to do my bit, to keep fabric out of landfill, and make the best use of the clothes (and fabric) I’ve got.
Mending may be about sustainability, but it’s also about looking after the clothes you love, so you can keep wearing them and loving them. I’ve got a couple of dresses that are a bit broken and need fixing, and if I can fix them I get to keep wearing them!
I’m trying to post daily on my instagram. History shows that I’m not very good with daily prompted challenges but I’m giving it a good old try. I’m not promising to meet the daily prompts, but I’m aiming to do *some* mending every day in March. Admittedly up till now its been mostly underwear. I’ve been going for the easy wins, especially on school nights, and double especially on nights when I’m teaching and don’t get home till 9.30 or 10pm. But there will be more exciting posts coming up at weekends when I have a bit more mindspace…
I don’t normally do sewing challenges, apart from Me Made May. Sewing challenges usually involve making clothes I don’t particularly want to make, to a deadline. I don’t want to make clothes to order. I like the freedom to make what I want, when I want. I don’t feel the need to make things than I won’t realistically wear. But this challenge is a lot more within my own sewing ethos.
No buying fabric, no buying patterns, no buying zips, buttons, interfacing, elastic, any sort of notion apart from general purpose thread. EEEEEEEP!!!!!!!
That’s the Heavyweight Division, and we all start there. If we buy notions, or patterns, we drop down to the Lightweight Division, but we still have a horse in the race. You drop out properly if you buy fabric. I’m not sure how far into the year I can get with this, but I’m damn well going to try! I’m certain I’ve got a sufficient fabric stash to see me through, and I think I could even manage with the notions I’ve got, unless I try making something really specialist, or massively out of my experience. My downfall is likely to be seeing something very pretty and getting a bad case of the Wants. So I’m hoping that Internet Accountability will be a powerful driver in sticking to the Challenge.
I don’t know what the rules are on Fabric Swaps, but I’m hoping that they are allowed so long as you don’t come away from the swap with more than you put in.
If you want to find out more about the challenge, and how it can help you to bond with your Stash, you should listen to Zoe’s Check Your Thread episode about it, with Lise herself.
I understand from 2023’s Last Sewist Standing that having a horse in the race is de rigeur. Mine will be called Gollum (see my instagram post on this for some kind of explanation).
The challenge starts Today. Wish me luck for the rest of the year!
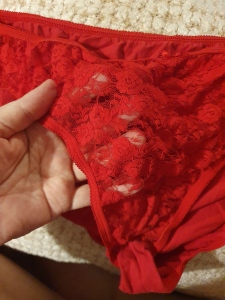
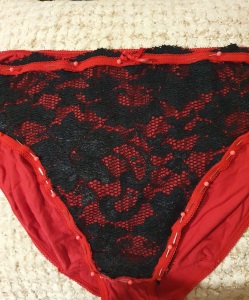
The problem: the lace on this otherwise perfectly ok pair of knickers had perished.
Time for some mending… I had some black stretch lace in stash. I’ve never been a fan of black and red lingerie, it makes me think of unimaginative husbands buying gifts for their wives on Christmas Eve. But I didn’t have any choice, I wasn’t going to buy more lace, for the sake of using 30cms x 20cms of it. Use what you have. I carefully cut out the rubbish red lace, and used it as a template.
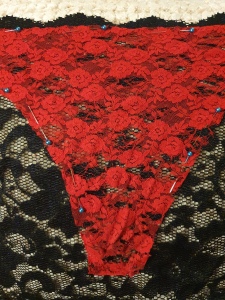
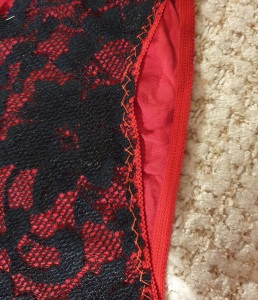
I pinned the new black lace into the remaining skeleton of red elastic.
I needed to keep the elastic… um, elastic. So I used a herringbone stitch to sew the lace onto the elastic. It’s not very neat, but nobody is inspecting the insides of my undies but me, and I’m not too judgy.
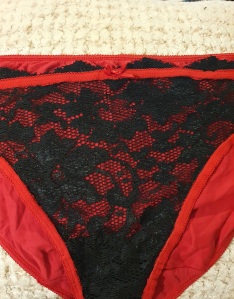
One final addition. I like my gussets to come up higher at the front than the shops do. So I added a bit of extra height with some black jersey from an old pair of leggings. Still using what I have.
And now I have a fully functional pair of knickers back in my undies drawer, and I reckon they’re better than when I first got them new.
Before 2024 has time to get its feet fully settled under the table, I’d better get my New Year Review done…
2023 has been a very productive year, and I’m attributing that to making my sewing more sociable. I found the Virtual Sewing Room and #SurreySews in the Summer, I did two SewCations, I did sewing socials online and face to face. It’s made me a lot more active in my sewing, and also more accountable. I’m not very good at self-motivation, but signing up for a social sewing session means I can carve out a set time for making, and I can plan for it and get projects moving.
It helped that I found/created a long sought after pattern for making stretch/knit dresses/tops, which I ganked from an old primark t-shirt. It’s brilliant! I love it! I’ve made several dresses and tops from it, and I’ve used it as a base/starting point for some slashing & spreading. I have loads more plans to keep using it.
There’s a couple of these that I never got around to blogging…
I’m proud of the fact I finally finished along-standing Work In Progress, resolving and/or accepting the problems I’d had with it.
I’ve learned that I must NEVER buy a pattern if it doesn’t include a bust dart. It doesn’t need to be a big bust dart, but a pattern that assumes an unshaped, flat chest is never going to work for me.
I did a lot of fabric curating this year. I donated a load of Deep Stash fabric to a local Refugee Sewing Project. I took some fabric to a Swap. It’s somehow lifted my spirits, like a good de-clutter always does. I’ve become a lot more careful what fabric I acquire. Yes, I acquired quite a lot of fabric this year, but I sewed a lot of it up. The pieces that are left, I have specific plans for. I’m being a lot more conscious about not wasting fabric, and making the most of my remnants. I’m half wondering whether to try doing the #LastSewistStanding, which is a No Buy challenge. I wonder how far along the year I could get?
Which leads me niftily on to my ideas for 2024…
I’ve got fabric and ideas for another few stretch dresses, easy peasy, lemon squeezy. Up first – a beautiful teal sweater knit version. It’s still Winter after all. I also want to see how far I can use my base pattern to adapt to different dress styles, because we all know I love a pattern-hack.
I’m planning on using up more of my remnants and I’m currently working on a scrappy project.
I’ve got a challenging project with the Alex Shirt pattern faffing. I’m feeling quietly confident with that, I’m happy that I know what sort of changes I need to make to the pattern. I think it should all be perfectly manageable.
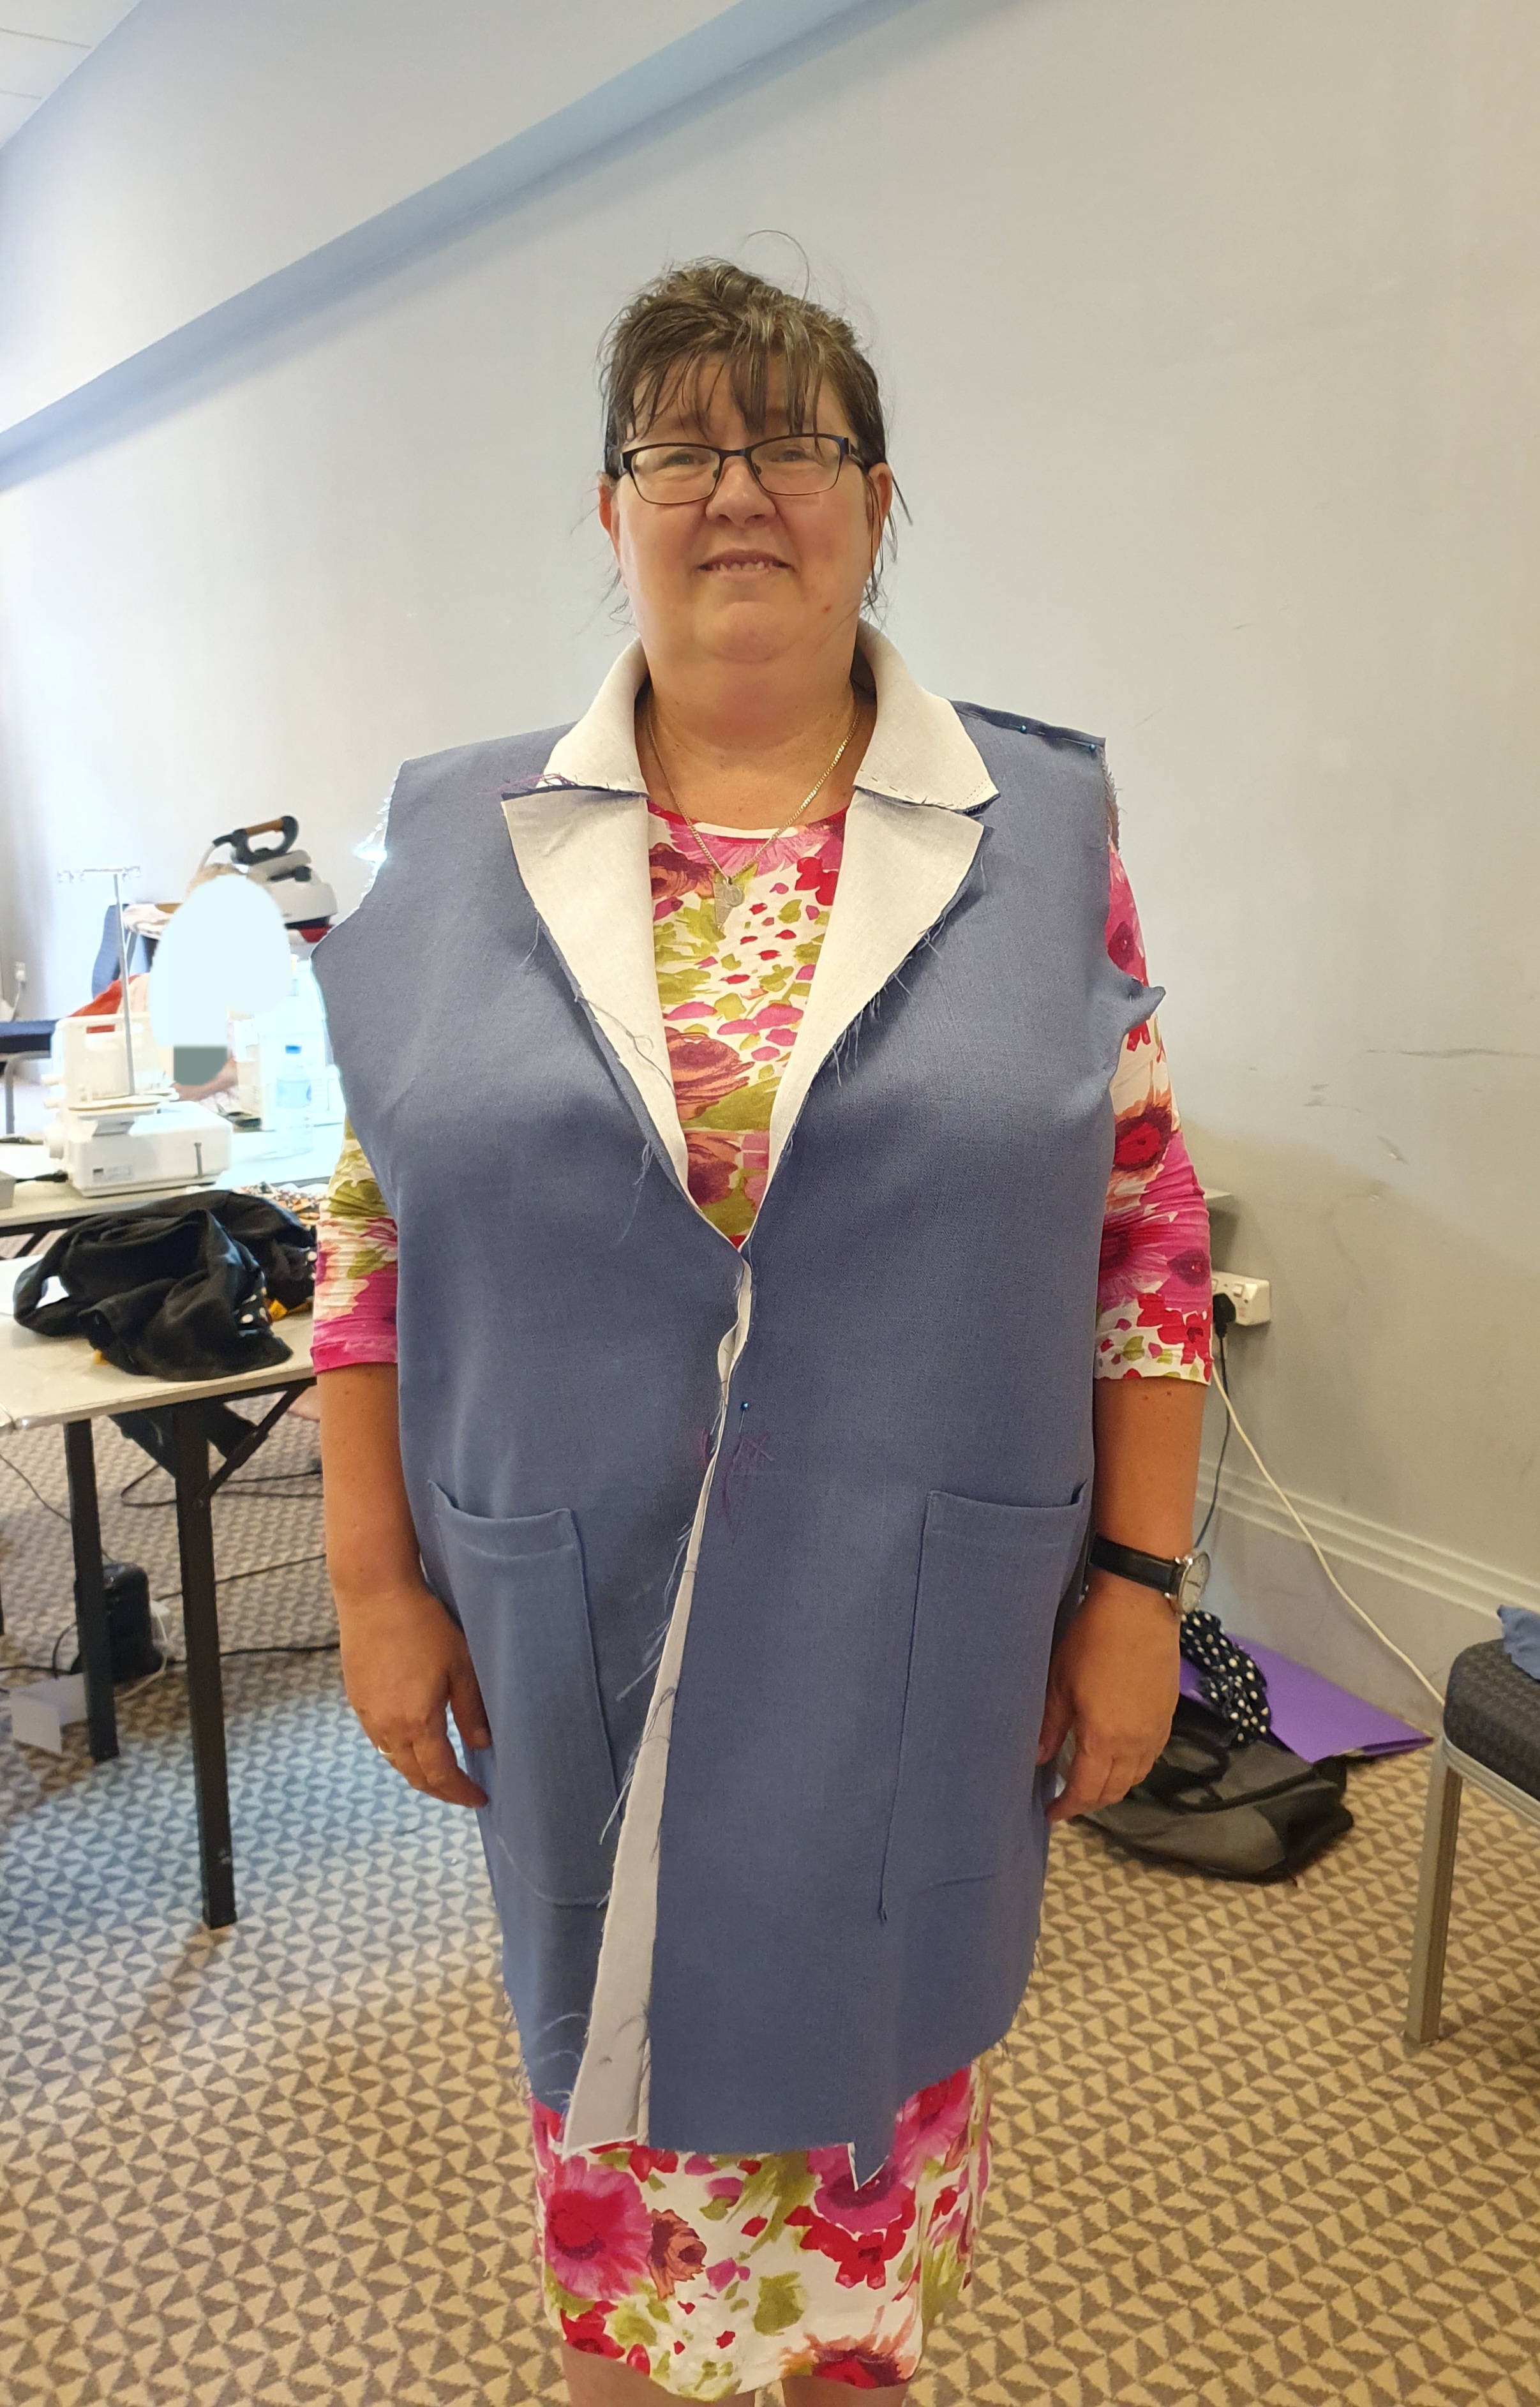
I’ve got a Big Project that I started this year, thinking (like an innocent fool) that it would be a merely medium-sized project. I got the Friday Pattern Company Heather jacket pattern, because I wanted some outerwear and Friday patterns go up to big sizes, and also this is a pattern with lots of hacking potential – I love a good hack! Then I toiled it, and I don’t know what they think happens to your proportions when you’re a fatty boom-batty, but it looked like I was starting my first year of St Trinians, wearing my big sister’s old blazer. It was massive and shapeless. I know it’s designed to be boxy, but look at it! It’s all wrong!
I’m smiling on the outside, but on the inside I was weeping at the amount of work this was going to take to sort out. And a huge chunk of the wrongness is because there’s no flippin’ bust dart and it needs a socking big FBA, to add fabric at the bust point and take it away at the bottom.
Yes, that’s when it really sank in about not buying patterns if there’s no shaping in them. It’s not a complicated pattern, as far as I can tell from the toile-ing, but dang, it needs a lot, really a LOT of adjustments for it to work for me.
So that’s my Big Project for 2024: the Heather Blazer. Although, by the time I’ve fettled it to a point where it’s remotely wearable, it will be nothing like the original pattern. I usually wait until I’ve finished a project before posting about it, but this might be a good one to post regular updates on. I’m choosing to see this as a massive long-term learning project, taking it one step at a time, and not worrying about how much work this will all take. Which is really hard for me, because I’m not one of those “It’s all about the Process” people, I’m definitely one of those “I want to be able to wear this thing NOW!” people. I’ve booked myself on another SewCation in March, and the Blazer will be one of the projects to work on there. So my plan is to get the first set of revisions worked out and made up into a new toile, so that I can get advice and suggestions from CL and Amanda on how I can move it forward from there.
Finally, I’m trying to do some mending. To be honest, I don’t have that much to do on garments as such, a bit of sorting out of hems, but that’s pretty easy (so why don’t I get on and actually do it?). There’s a lot more mending to do on tights. I tend to put holes in the Right toe of my Snag tights, which are in all other ways very hard-wearing. I guess my right foot is a smidge longer than my left, and rubs more against the inside of my shoes. So I’m trying to stitch those holes closed as & when I notice them. I also need to go through my knicker drawer and do some patching of holes, replacing of gussets* and deciding which of them are simply too old and knackered to keep.
And since this year everyone’s doing their Ins and Outs, in summary…
IN – Moar lovely easy stretch dresses – Pattern Faffing, for the Alex shirt and Heather Blazer – Deferred Gratification – Shopping my Stash – Mending
OUT – Patterns with no bust dart shaping – Buying more stuff
* The word “gusset” always makes me laugh like a 12 year old looking up the rude words in the dictionary.
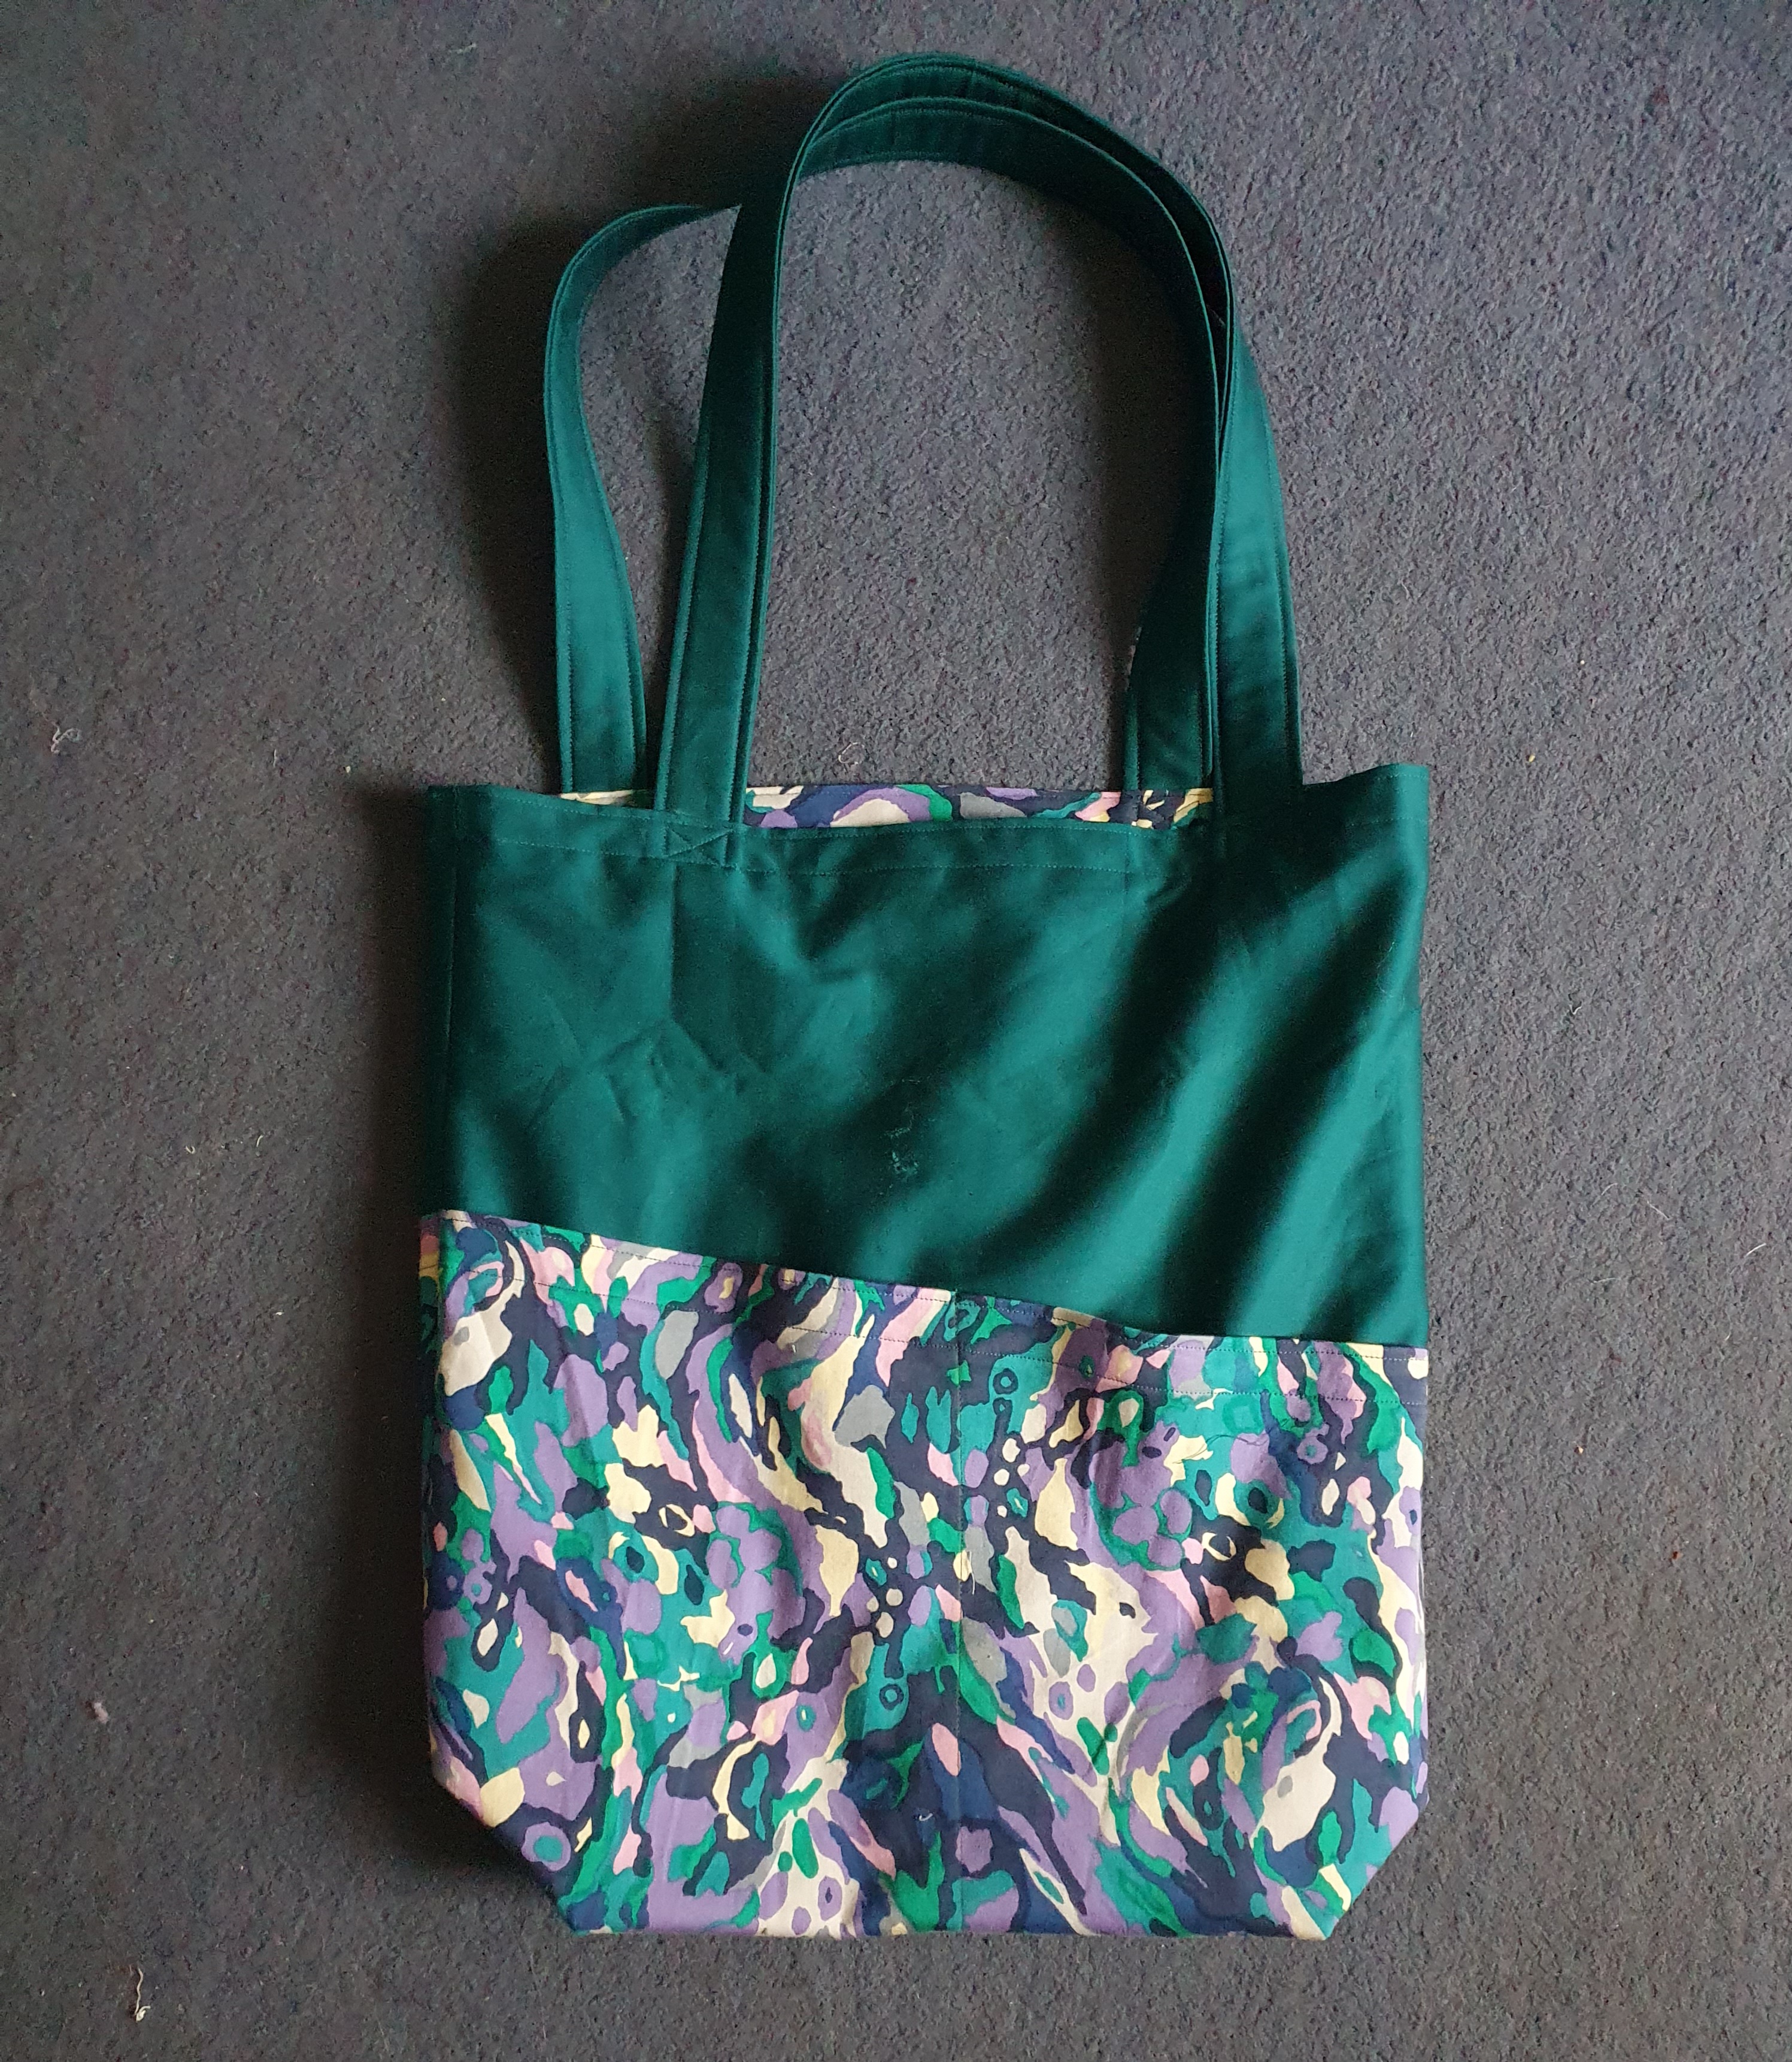
I wasn’t sure what fabric to use. I’ve cut my stash down a fair bit, but I pulled out a deep teal coloured sateen, left over from a dress I made a long time ago. The remnants were too pretty to get rid of, and I’d always thought I could combine them to make something else. Then when I was rummaging around to see what other bits I’d got, I pulled out this dress that I also made a long time ago and which I no longer wear and I’d been meaning to upcycle for ages. And it was a marriage made in heaven! Another sateen in the same sort of weight. And so pretty!
This is officially the right way out
The Costa Tote is a free pattern from Helen’s Closet Patterns, if you sign up for her email list. She’s not been at all spammy, so it’s no hardship at all. And it’s a smashing pattern. It’s a bit fabric hungry, because it’s big and roomy, and it’s fully lined, and it has mahoosive pockets, but it’s definitely worth it.
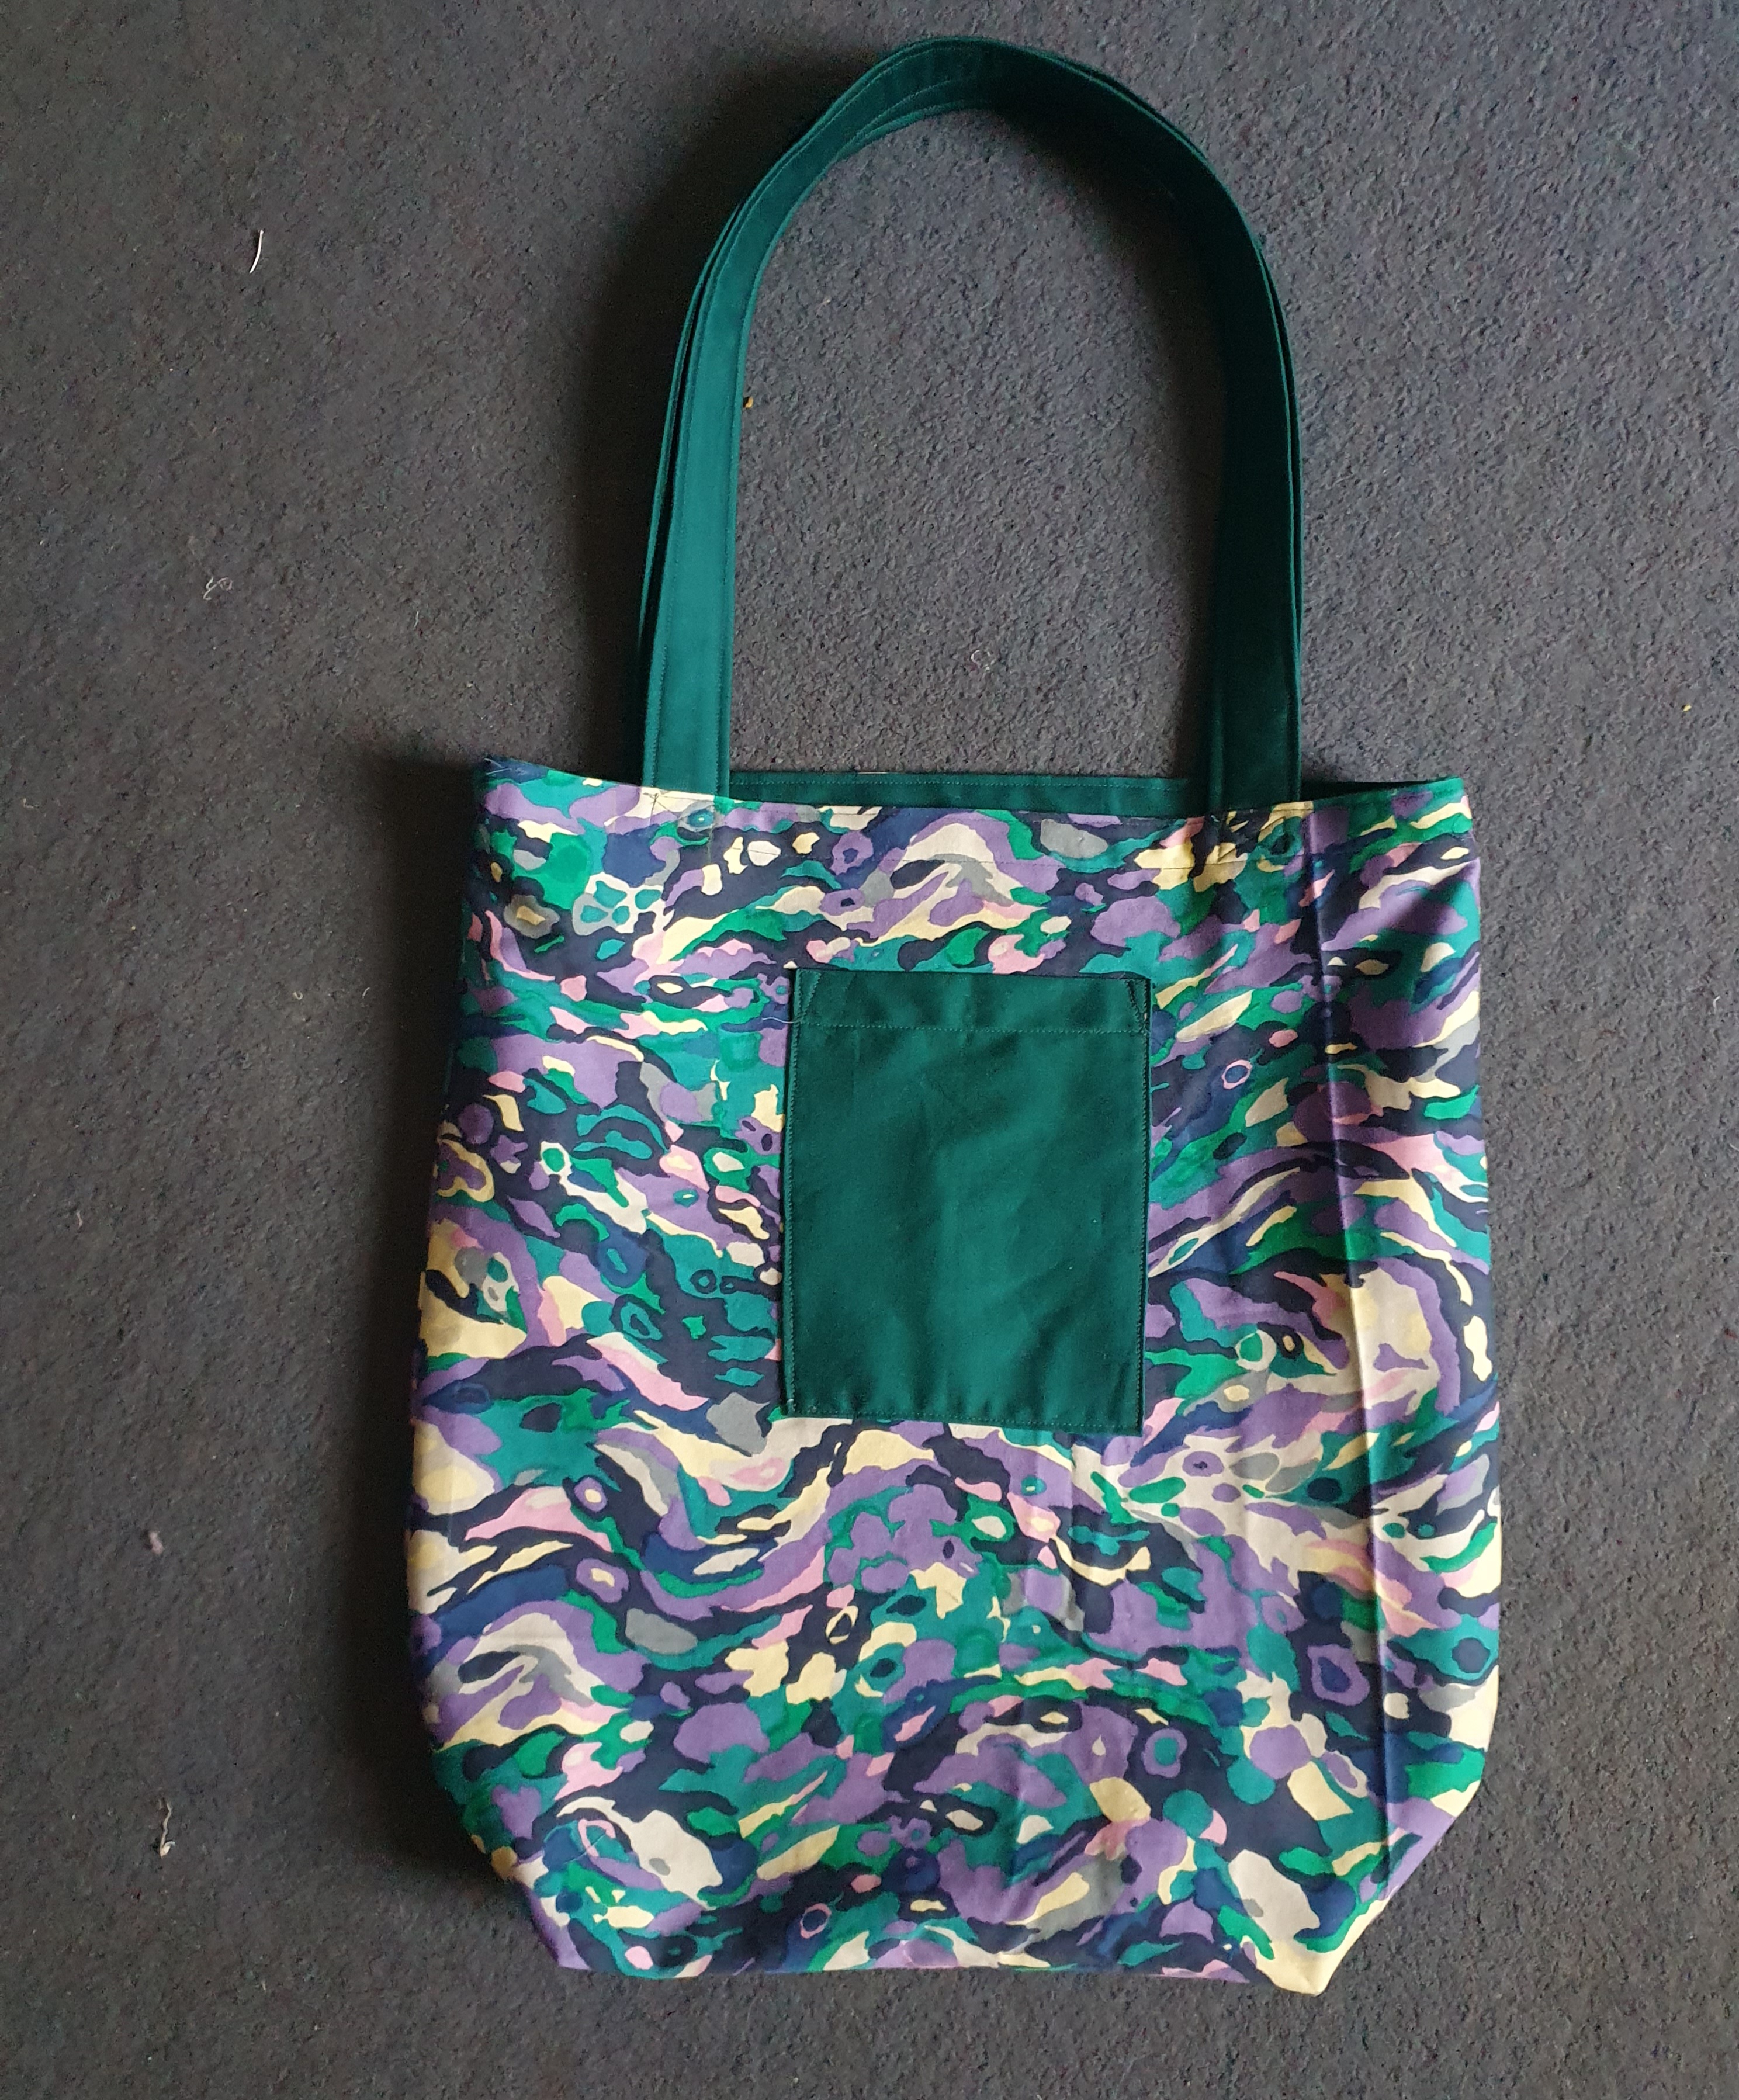
And this is the inside, with a bonus patch pocket (don’t look too closely!)
It’s reversible, so if I wanted to, I could have the big capacious pockets hidden inside, and the glorious swirly fabric all on show. It’s properly robust, and I feel like I could sling quite a lot into it, and it would hold up fine.
The pattern was easy to follow, and made good sense. I tweaked it only very slightly to add that patch pocket, and to make the straps a smidge longer, because if I wear a big jumper or coat, I don’t want to feel I’m all constricted.
The other Virtual Sewing Room participants all made amazing versions of this bag, with webbing straps, with built in key rings, with fewer pockets, more pockets, zipped pockets… You can see here. I think there’s probably still a few more that haven’t submitted photos yet.


